
AI Model
Mastering Visual Storytelling with DALL·E 3: A Professional Guide to Advanced Image Generation

- Share
- Tweet /data/web/virtuals/375883/virtual/www/domains/spaisee.com/wp-content/plugins/mvp-social-buttons/mvp-social-buttons.php on line 63
https://spaisee.com/wp-content/uploads/2025/07/elephant-1-1000x600.png&description=Mastering Visual Storytelling with DALL·E 3: A Professional Guide to Advanced Image Generation', 'pinterestShare', 'width=750,height=350'); return false;" title="Pin This Post">
Introduction: From Creator to Composer
You’ve explored the basics. You’ve learned to build structured prompts, balance clarity with creativity, and generate strong, coherent images with DALL·E 3. Now you’re ready to go deeper. This guide is for those who want to move from simply generating images to composing visual stories and unlocking the true potential of prompt engineering.
This is a hands-on, example-rich guide written for intermediate users of DALL·E 3—those who have read the first tutorial and now want to refine their craft with advanced techniques.
Each chapter will introduce a new skill, show you how it works in practice, and offer real prompts to try and adapt.
All examples are written for DALL·E 3.
Chapter 1: Composing Complex Scenes
What You Will Learn: How to describe scenes with multiple subjects, each with unique characteristics, and how to define spatial relationships.
Goal: Create images where several characters, objects, or elements coexist logically and visually.
How-To: Instead of writing a single sentence that tries to do everything, break your scene into logical segments. Use relational phrases like “to the left of,” “behind,” “in the distance,” and “in the foreground.” This gives DALL·E a hierarchy of composition to follow.
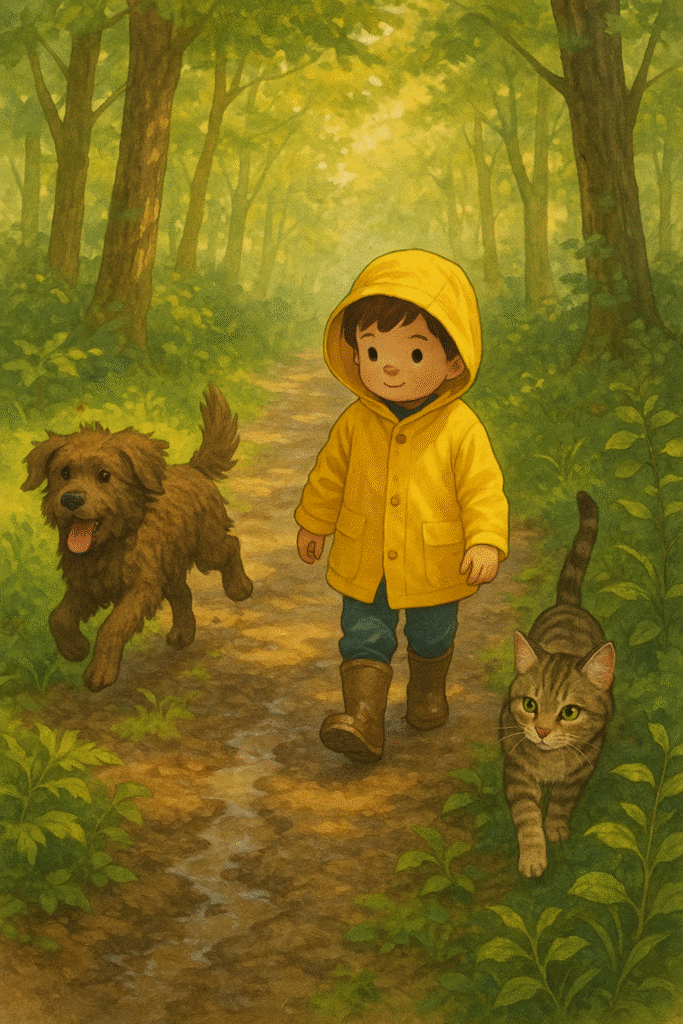
Ineffective Prompt: “A cat, a dog, and a boy in a forest.”
Improved Prompt: “In a sun-dappled forest, a small boy in a yellow raincoat walks along a muddy path. To his left, a shaggy brown dog runs ahead joyfully, while to his right, a curious tabby cat walks cautiously through the underbrush.”
Try this:
- Use directional terms: left, right, foreground, background, center
- Assign actions or expressions to individual characters
- Set a consistent time of day and lighting for unity
Chapter 2: Multi-Image Referencing
What You Will Learn: How to combine elements from multiple reference images into one cohesive scene.
Goal: Generate images that borrow specific visual elements (character design, background, styling) from other images.
How-To: If you’re using DALL·E inside ChatGPT, you can upload multiple images and reference them directly in your prompt. For example, you might say: “Use the character from image 1 and the environment from image 2.” Think like a creative director: instruct the AI on what to borrow from each image and how they should be combined.
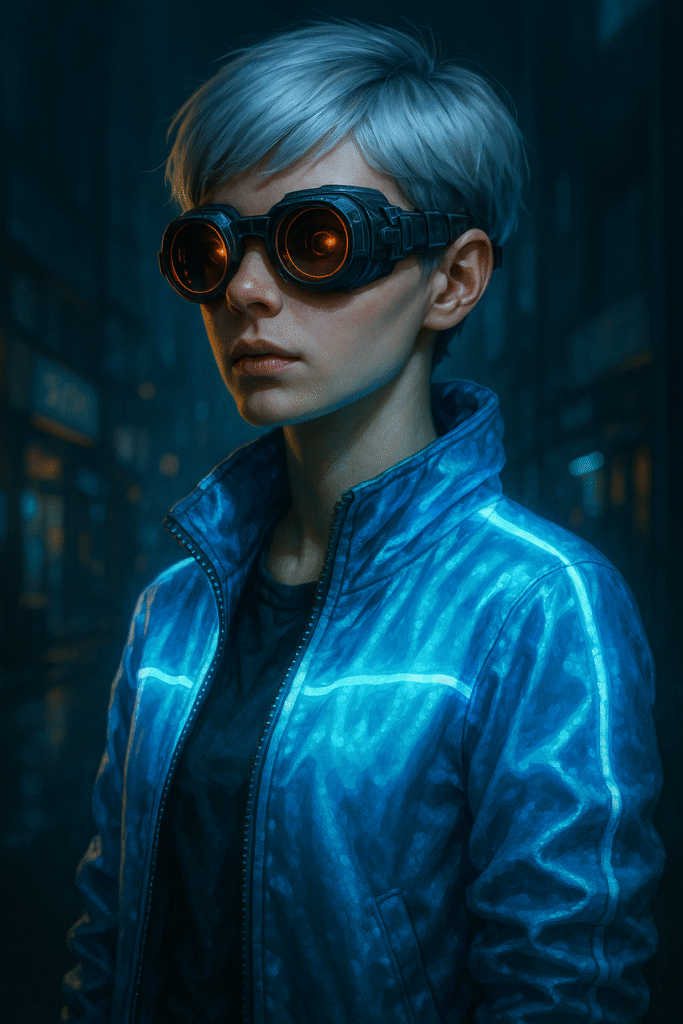
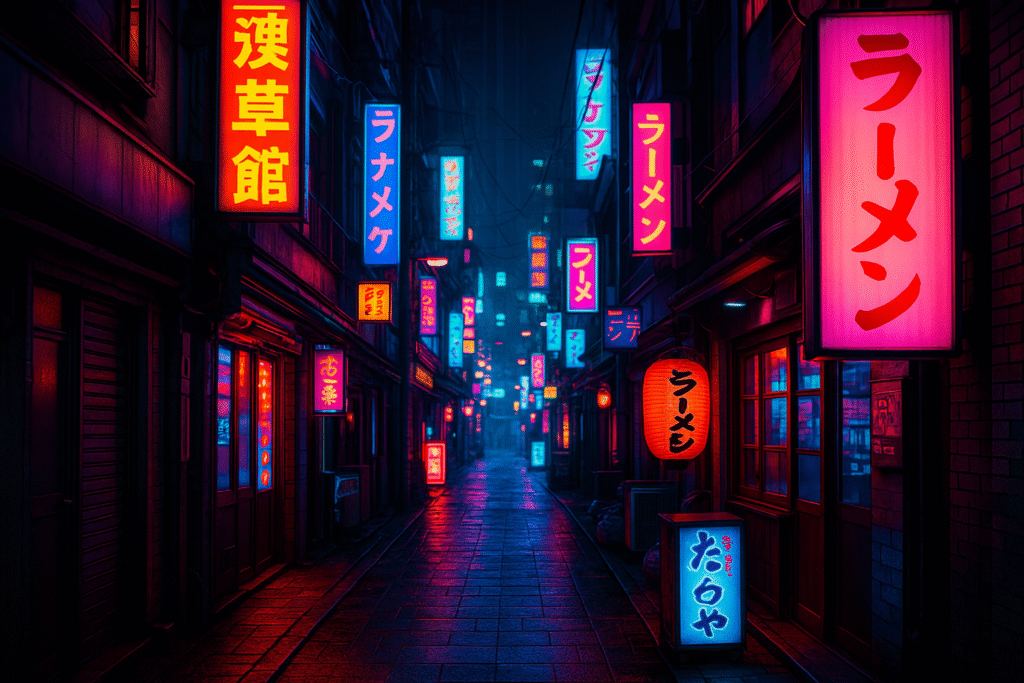
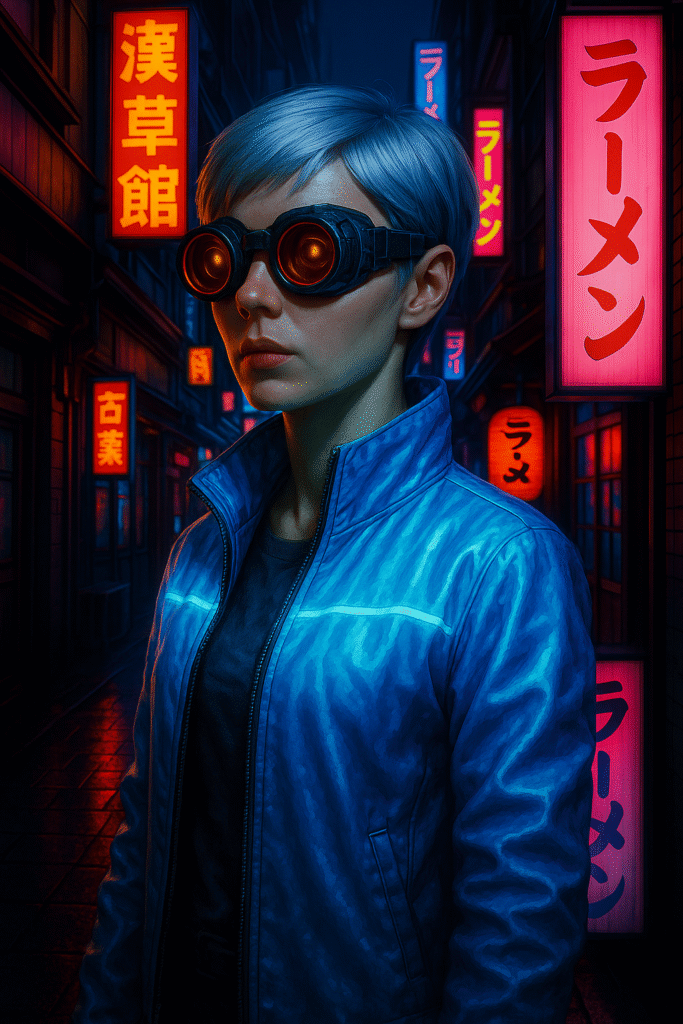
Prompt Example: “Take the young woman from the first image, with short silver hair, cyberpunk goggles, and a glowing blue jacket. Place her in the neon-lit Tokyo alleyway from the second image. Maintain the cinematic lighting and futuristic vibe of the alley while keeping her facial features and outfit from the original.”
Input image 1:
Input image 2:
Here is the resulting image that took the character from image 1 and the background from image 2. You need to copy all the images you are referencing into the prompt.
What to Try:
- Combine real photos and illustrations stylistically
- Borrow color palettes: “use the color scheme from a 90s comic book”
- Anchor characters with clear visual traits (hair, outfit, posture)
Chapter 3: Micro-Edits Without Edit Mode
What You Will Learn: How to change only a small detail in a scene without losing the rest.
Goal: Gain more granular control over revisions by anchoring context.
How-To: Since DALL·E doesn’t yet allow for pixel-precise edits outside of edit mode, you can mimic this behavior with prompt reinforcement. Describe the whole scene as it should be, then name only the detail you want to change.
This is the original image:
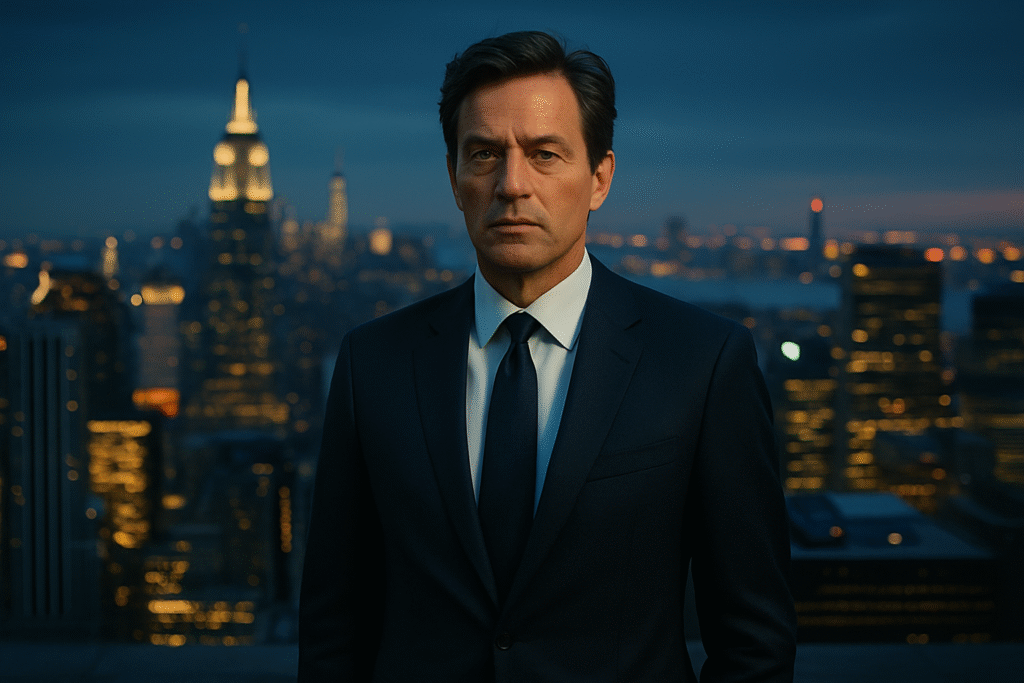
Prompt Example: “A man in a business suit stands on a New York rooftop at dusk, city lights glowing behind him. Keep the entire scene the same, but change his tie from black to dark red with yellow dots.”
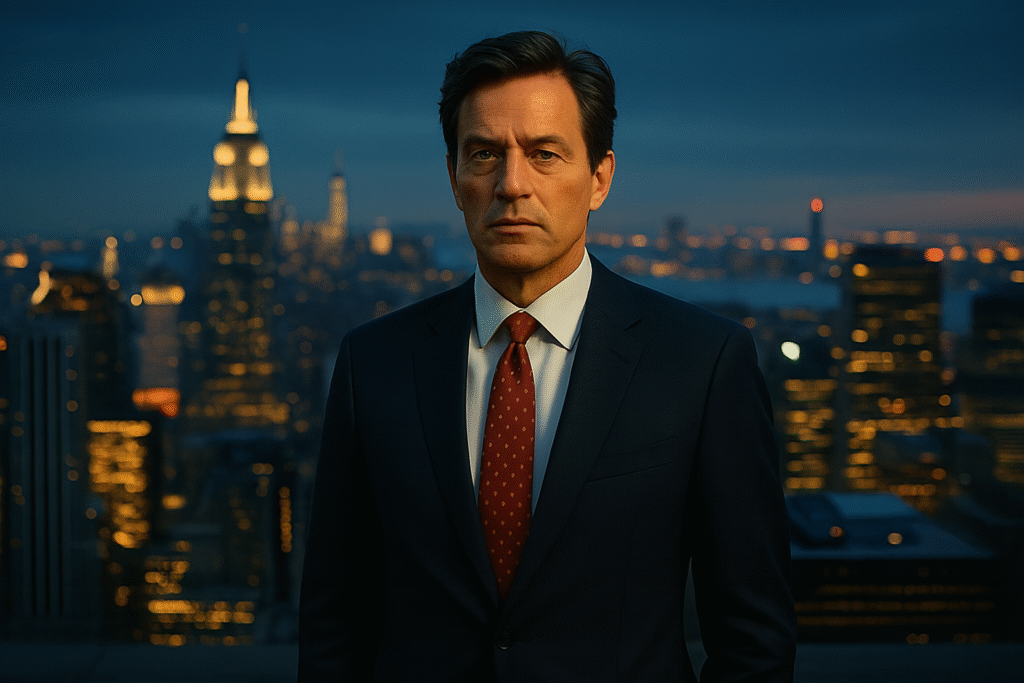
The resulting image with a slight change:
Tip: Repeat the unchanged parts of the scene to reinforce them. DALL·E relies on verbal context.
Bad Prompt: “Same image, but change the tie color.”
Better Prompt: “Keep the same man, rooftop, lighting, and background. Only change the color of his tie from black to dark red with yellow dots.”
Chapter 4: Style Swapping While Preserving Composition
What You Will Learn: How to retain the scene but change the artistic style, mood, or visual tone.
Goal: Render one composition across different visual interpretations.
How-To: This is where DALL·E excels at “repainting” an image with a new visual language. Keep your prompt structure consistent, but swap out the style or emotional description.
Copy the original image into the prompt and request a style change.
Prompt Variations:
- “Same cottage and composition. Rendered in Studio Ghibli animation style.”
- “Same cottage and composition, but in photorealistic style with dramatic lighting.”
- “Same scene in watercolor style, evoking peaceful nostalgia.”
Original image:

The resulting image with the same scene in Ghibli style:

Style Phrases to Try:
- In the style of Gustav Klimt / Frank Frazetta / a Pixar short
- As a charcoal sketch / pixel art / manga
- Lit like a golden hour movie scene
Chapter 5: Panel and Window Composition
What You Will Learn: How to describe split scenes or multiple visual windows within one frame.
Goal: Create images that include multiple perspectives, panels, or visual frames.
How-To: Treat each window or panel as a mini scene with a title or descriptor. Be specific about position: top/bottom, left/right, panel 1/panel 2.
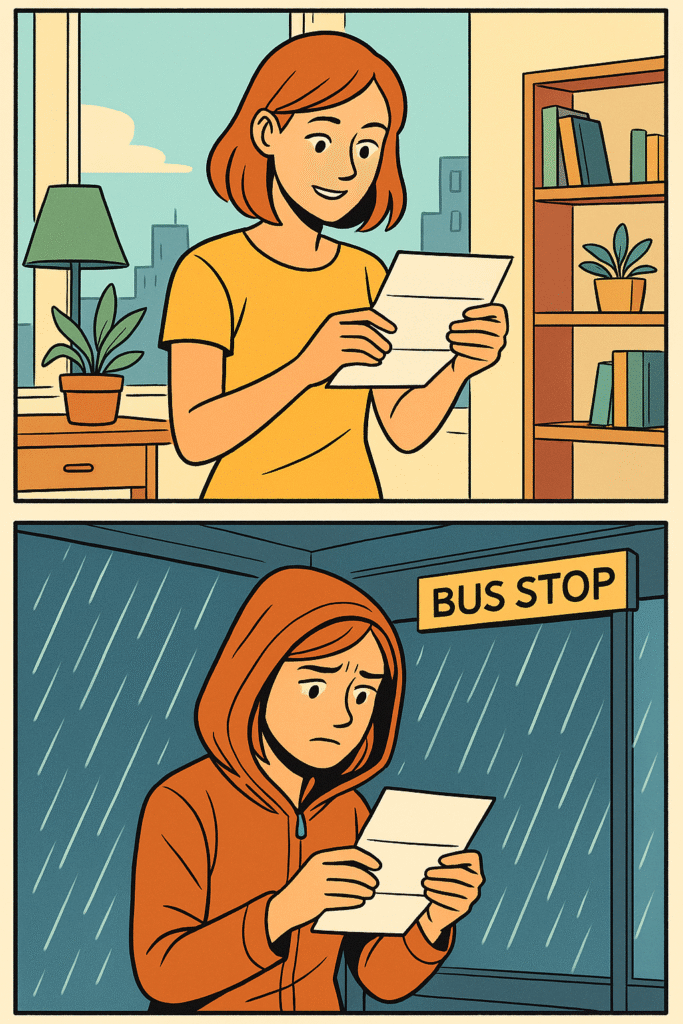
Prompt Example: “A comic-style layout with two horizontal panels. Top panel: a young woman opens a letter in a bright apartment. Bottom panel: the same woman reading the letter at a bus stop in the rain, her expression changed to concern.”
Variants:
- Use “before and after” structure
- Try triptychs for environmental storytelling
- Describe time progression within frames
Chapter 6: Prompt Chaining for Narrative Sequences
What You Will Learn: How to guide DALL·E through multi-step image creation using narrative logic.
Goal: Generate a series of images that evolve in content.
How-To: Use output from one image as the baseline for the next. Reiterate known elements and introduce new changes logically.
Example Series:
1) “A knight riding into a foggy forest.”
2) “Same knight, now standing before an ancient stone gate within the forest.”
3) “Same scene, now showing the gate opening, revealing a glowing blue chamber.”
Image 1:

Image 2:
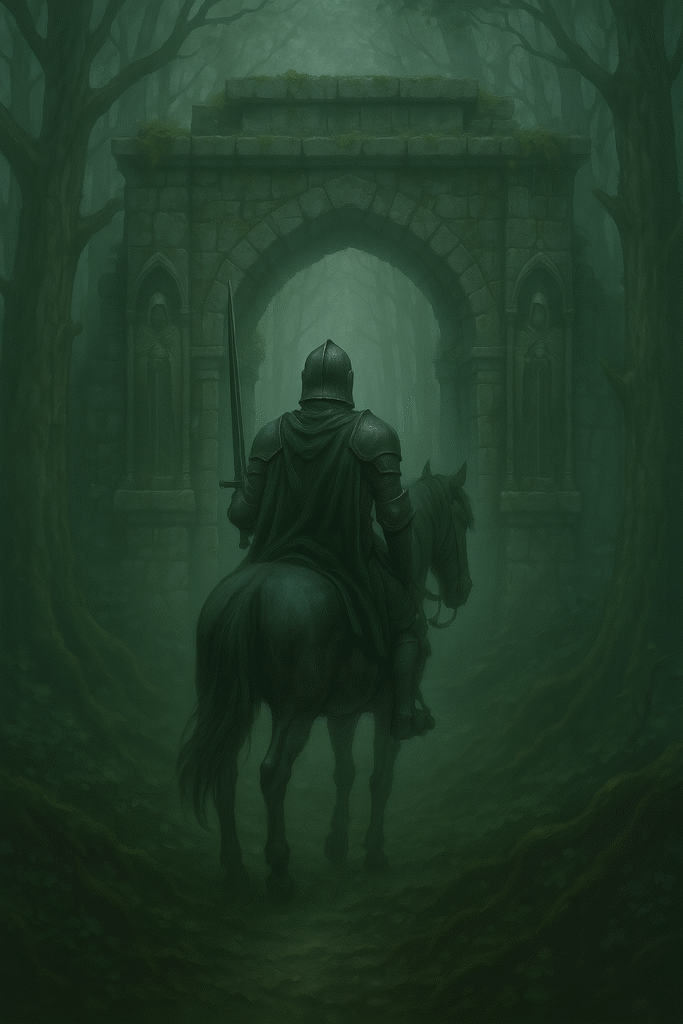
Image 3:
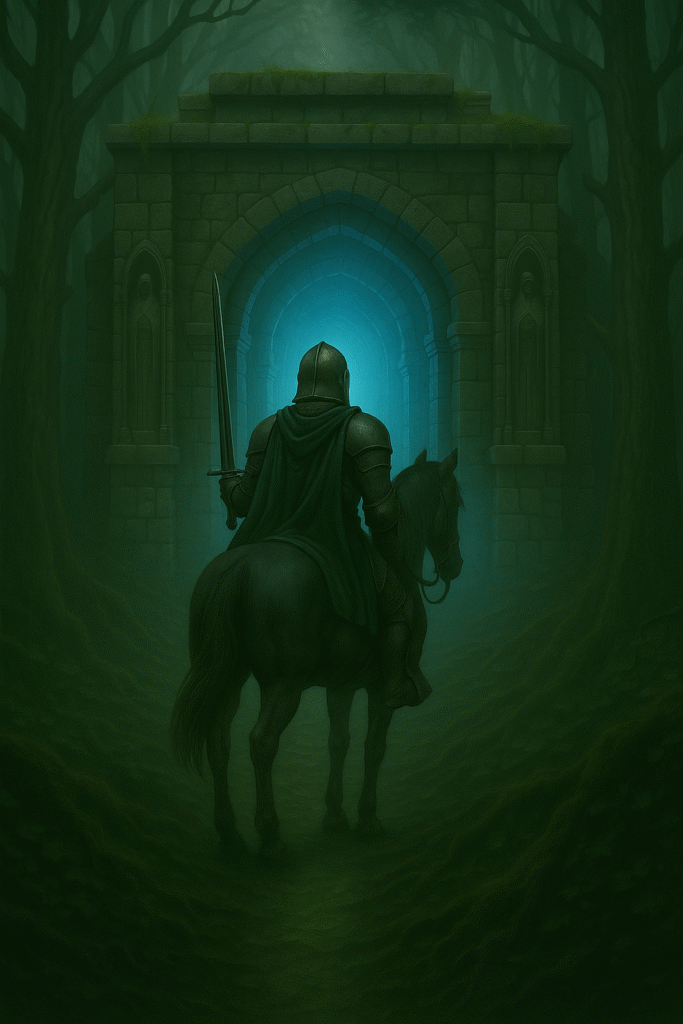
Key Tactic: Reinforce continuity between steps with clear references.
Chapter 7: Prompt Weighting and Emphasis
What You Will Learn: How to subtly prioritize certain elements in your prompt.
Goal: Control which parts of a scene DALL·E emphasizes visually.
How-To: Although DALL·E doesn’t support weighted tokens like some models, you can simulate emphasis through repetition and elaboration.
Example Prompt: “A vast, VAST desert stretching endlessly under a pale sky. In the center, a tiny, weathered temple with crumbling pillars. The desert is the dominant feature.”
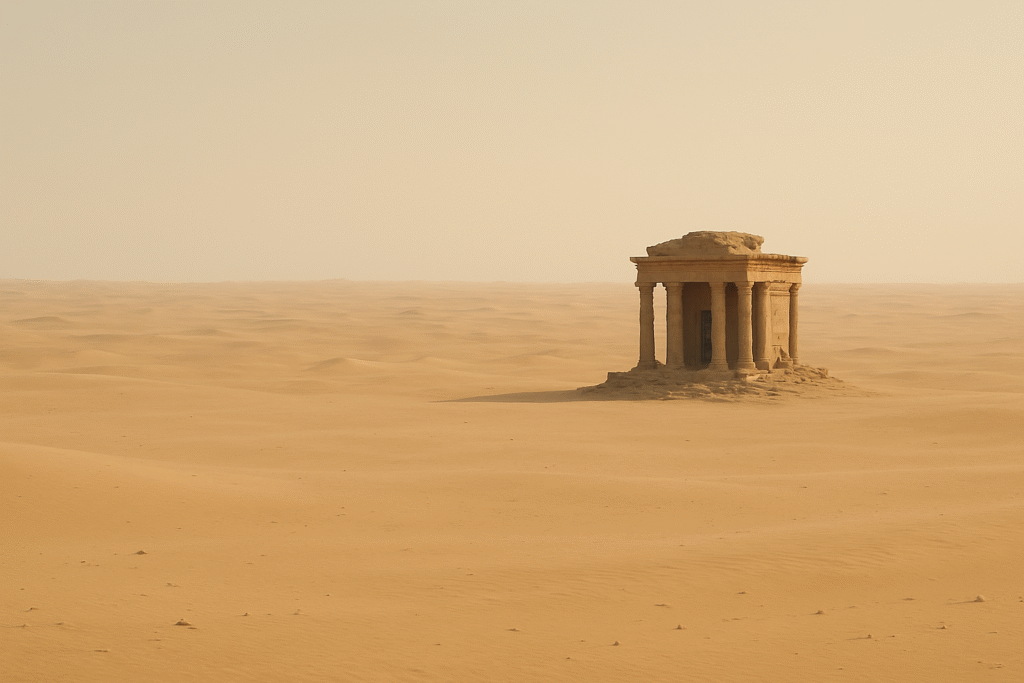
Alternatives:
- “Dominated by…”
- “Most of the image shows…”
- Repeat key ideas: “desert, sand dunes, horizon, dry, endless sand”
Chapter 8: Image Consistency Across a Series
What You Will Learn: How to generate multiple images that feature the same character, style, or visual language.
Goal: Create a set of images that feel narratively and visually cohesive.
How-To: Use fixed identifiers: “the same woman with auburn hair in a green leather jacket” or “a robot with a cracked glass eye and rusted steel arms.”
Repeat these identifiers in every image. Anchor clothing, posture, background tones.
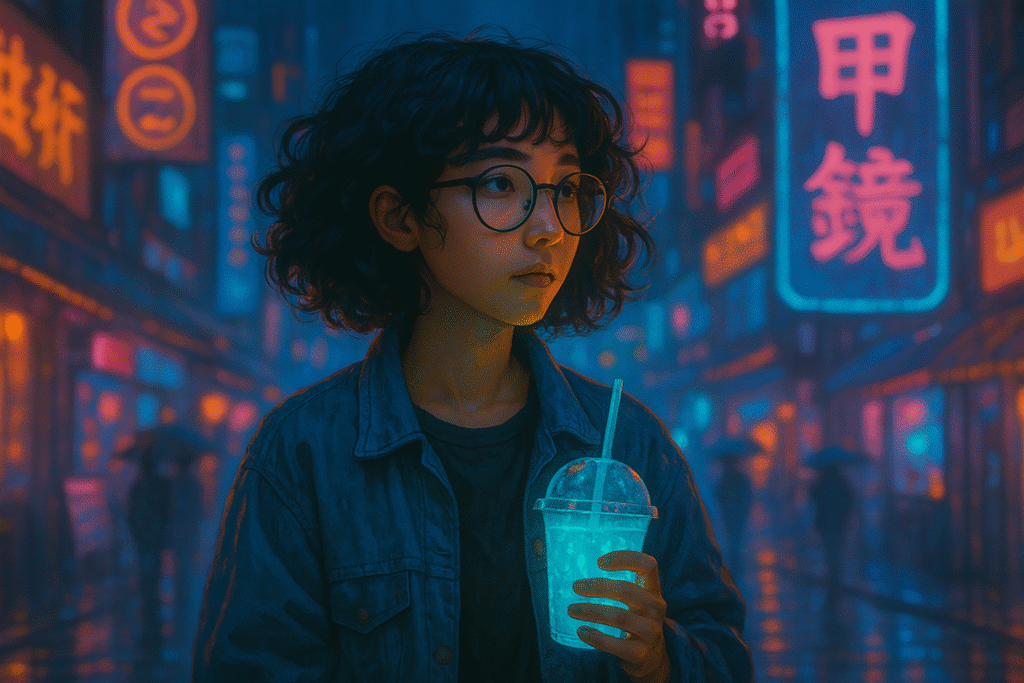
Prompt Set:
- “The same teenage girl with curly black hair, oversized denim jacket, and round glasses, sitting on a rooftop at night.”
- “Same girl walking through a neon-lit street, holding a glowing drink, wearing the same denim jacket.”
Images 1 and 2:

Chapter 9: Using Negative Prompts (Implicit Control)
What You Will Learn: How to indirectly steer DALL·E away from unwanted features.
Goal: Improve image quality by filtering out problematic elements.
How-To: DALL·E doesn’t formally support negative prompts, but you can preempt unwanted features.
Example Prompt: “A clean, white ceramic kitchen with natural lighting. No people, no text, no logos.”
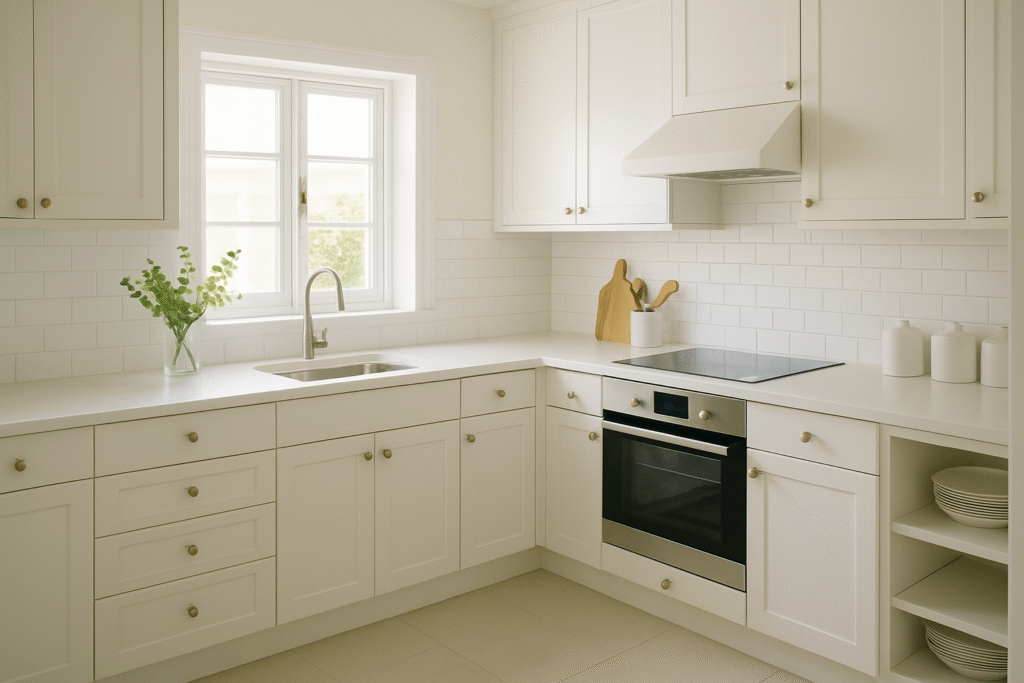
Phrases to use:
- “Without…”
- “Excludes…”
- “No visible…”
Chapter 10: Overcoming Biases and Defaults
What You Will Learn: How to spot and override DALL·E’s default outputs.
Goal: Avoid generic or stereotypical visuals.
How-To: DALL·E sometimes defaults to common interpretations: businesspeople in suits, European architecture, etc. Be culturally and visually explicit.
Weak Prompt: “An office worker sitting at a desk.”
Better Prompt: “A young Indian woman in a colorful sari working on a laptop in a sunlit co-working space in Mumbai, surrounded by plants and murals.”

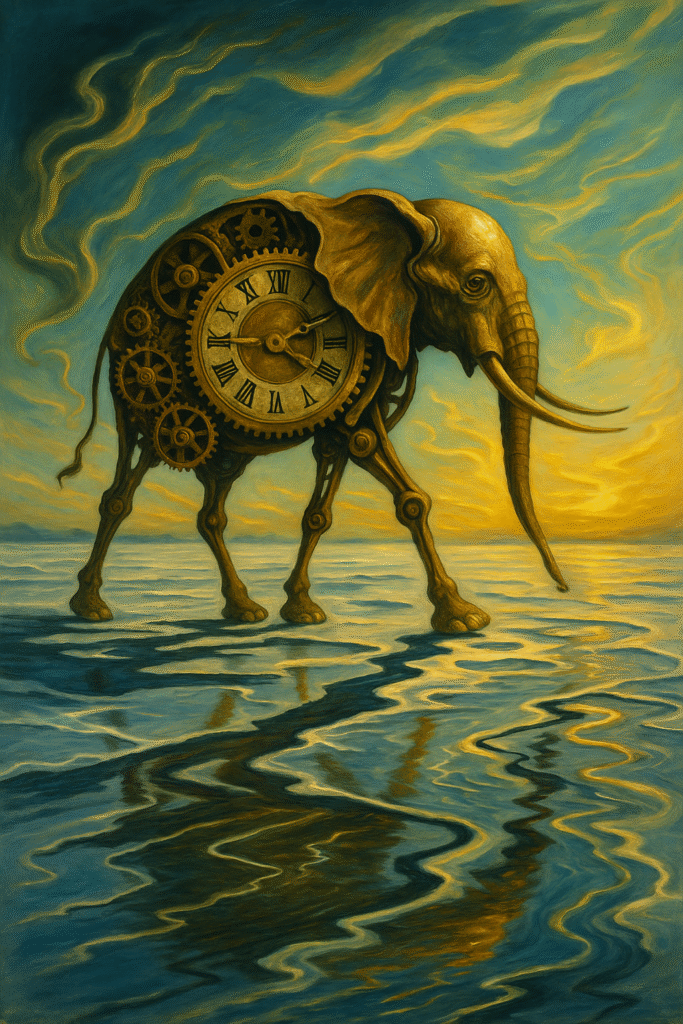
Chapter 11: Photorealism vs. Surrealism
What You Will Learn: How to control realism level and creative exaggeration.
Goal: Direct DALL·E’s rendering style between grounded photography and imaginative art.
How-To: To push realism: “Photorealistic, natural lighting, DSLR clarity, 35mm depth of field.”
To push surrealism: “Dreamlike, impossible proportions, Salvador Dali style, floating elements.”
Prompt Test:
1) Realism: “A bowl of fresh fruit on a wooden table, soft morning light, shallow depth of field.”
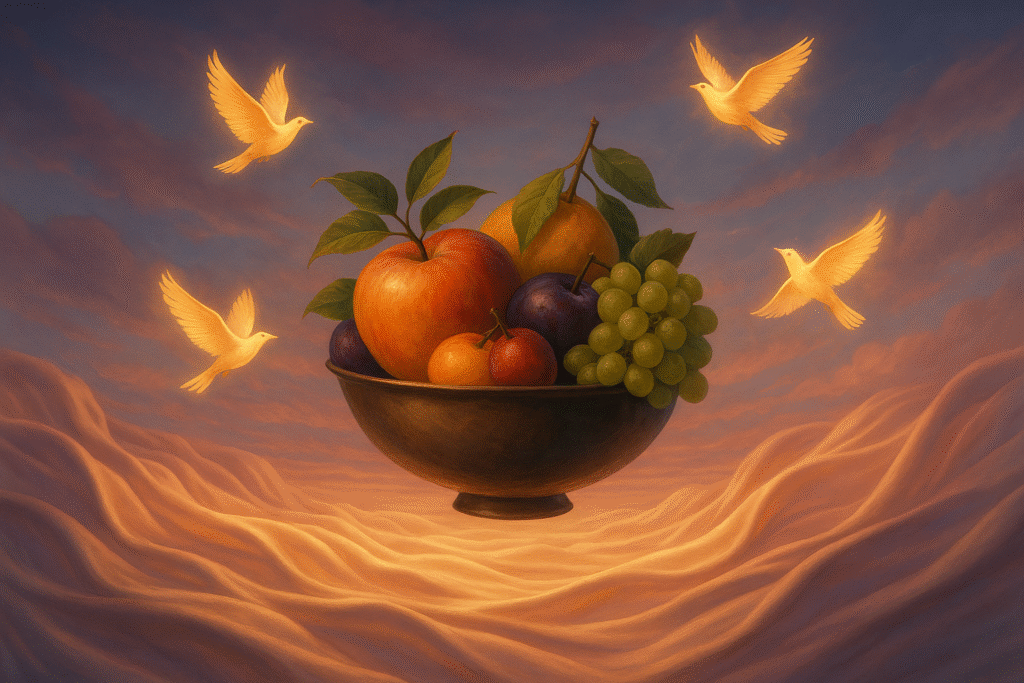
2) Surrealism: “A floating bowl of fruit in a sky made of silk, with glowing birds circling around.”
Image 1:
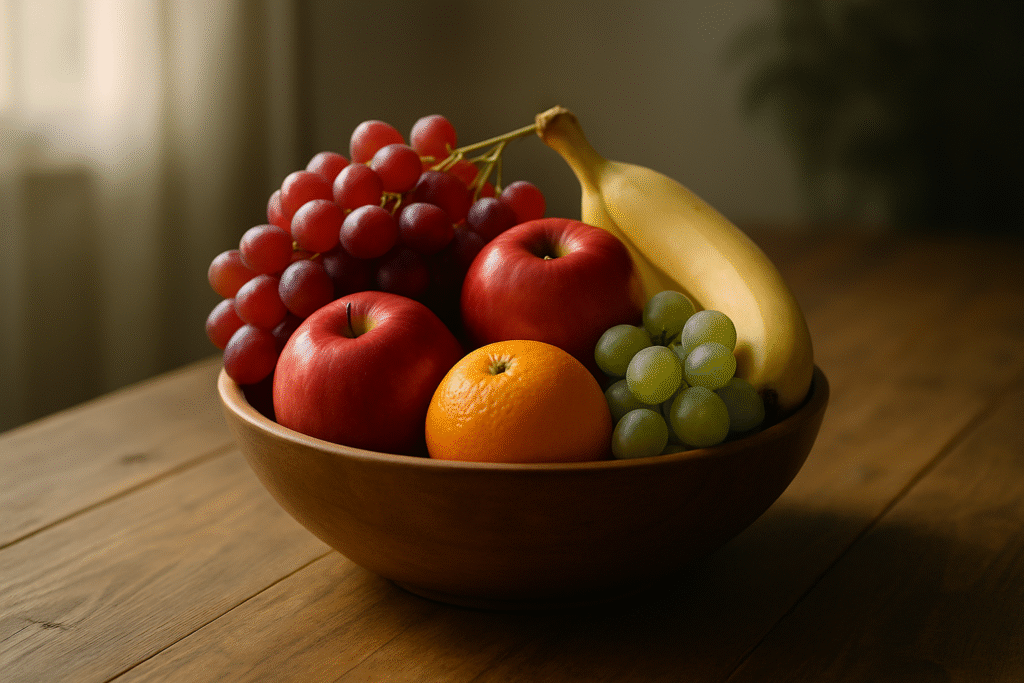
Image 2:
Chapter 12: Defining Image Ratios and Aspect Orientation
What You Will Learn: How to suggest whether the image should be horizontal, vertical, or square, and what phrasing improves results.
Goal: Gain greater control over the image’s composition and framing, especially for posters, mobile art, and cinematic frames.
How-To: While DALL·E does not take explicit aspect ratio inputs through prompt text, phrasing can encourage it to interpret the scene with a certain orientation.
Common Phrasings to Try:
- “Cinematic wide shot”
- “Tall vertical illustration”
- “Poster format”
- “Square layout, centered subject”
Prompt Comparison:
- Default: “A wizard standing on a cliff during a lightning storm.”
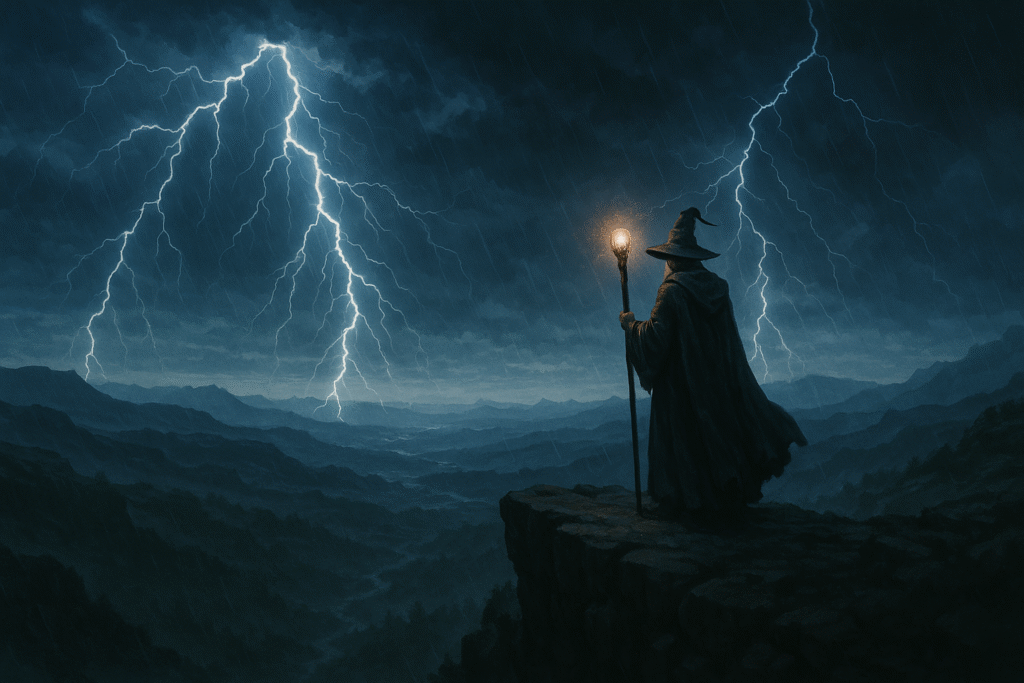
- Horizontal framing: “A cinematic wide shot of a wizard standing on a cliff during a lightning storm, vast landscape spreading left and right.”
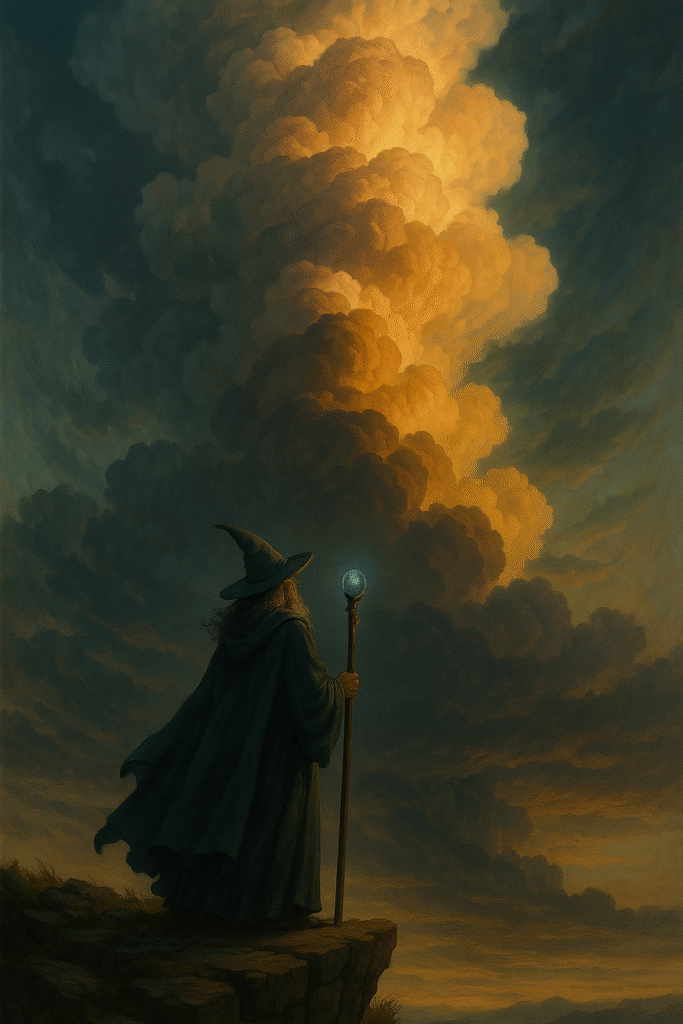
- Vertical framing: “A tall, vertical fantasy illustration showing a wizard on a cliff, towering storm clouds rising above him.”
Horizontal framing:
Vertical framing:
Try These Alternatives:
- Use real-world framing cues like “magazine cover,” “billboard format,” or “Instagram post style.”
- Mention camera angles like “overhead view” or “close-up portrait” to shape the image framing.
While it doesn’t guarantee an exact ratio, careful description of space and composition strongly influences the visual structure.
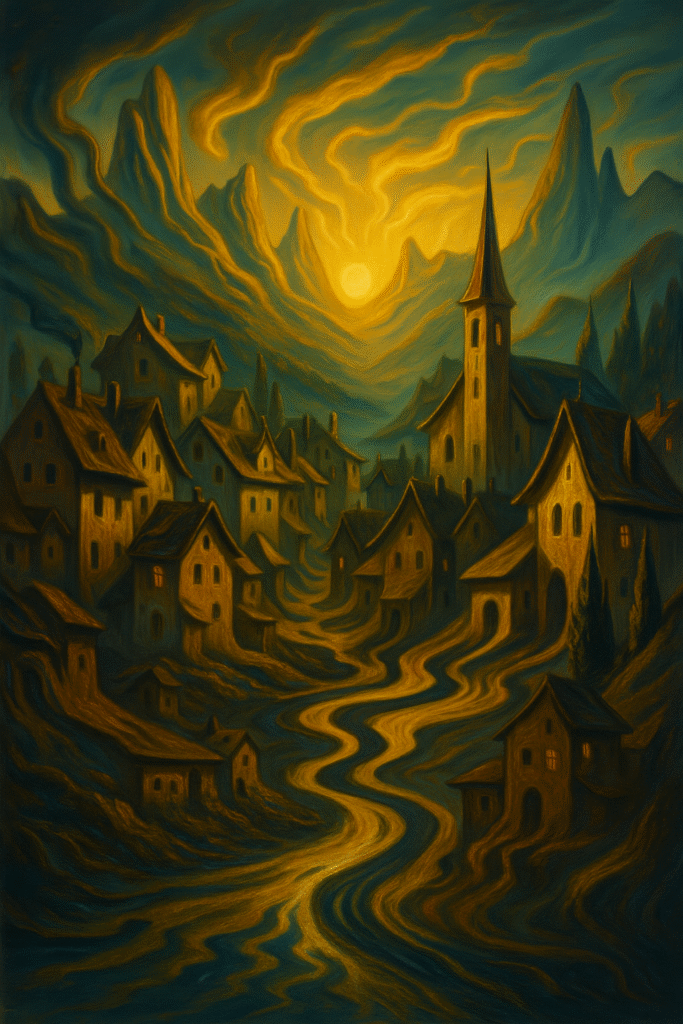
Chapter 13: Extracting and Applying Style from a Reference Image
What You Will Learn: How to analyze the visual characteristics of an existing image and use them to influence your own generations.
Goal: Recreate the style—not just the content—of a reference image, whether it’s from another artist, a film, or a previous generation.
How-To: Start by uploading a style reference image to ChatGPT. Then, describe the artistic attributes you want to extract from that image. These might include brush strokes, lighting, palette, composition, texture, line quality, or mood.
You can say things like:
- “In the style of image 1”
- “Apply the visual texture and lighting from the uploaded painting.”
- “Use the same color palette and brushwork as in the style reference.”
Use these phrases early in your prompt to establish the dominant influence.
Example Prompt: “Draw a mountain village at dusk in the style of Salvador Dalí, with melting shadows and surreal lighting as image 1.”
This is image 1 with the style that is to be copied.
Result image:
Advanced Tip: You can also describe the mood or emotional tone: “Apply the melancholic tone and high-contrast lighting from image 2.”
Common Style Cues to Observe:
- Color palette (pastel, high saturation, monochrome)
- Brushwork or texture (smooth gradients, oil strokes, pixel art, charcoal)
- Line work (clean outlines vs. sketchy)
- Composition (framed symmetrically, overhead views, close-ups)
Bad Prompt: “Make it like image 1.”
Better Prompt: “Use the color scheme, lighting contrast, and line style from image 1, but apply it to a sci-fi cityscape at night.”
Why It Works: You’re giving DALL·E specific visual traits to emulate rather than leaving it to guess what you mean by “like.”
This technique is extremely powerful when building series, brand visuals, or adapting moodboards into full scenes.
Chapter 14: Exploring Variations — Similar, Not Identical
What You Will Learn: How to prompt AI for a set of images that share a visual identity but aren’t repetitive.
Goal: Generate multiple original images in the same style and vibe, without duplicating the same composition or subject exactly.
The Problem:
You like an image the AI made—sort of. You want another one like it, but not a clone. Just “inspired by it.” This is a gray zone for AI models. If you’re too vague, it just copies. If you’re too specific, it locks into the same layout.
How-To:
Think like a concept artist exploring variations on a theme. Tell the AI what to keep and what to change. Emphasize style consistency while inviting compositional or subject diversity.
Prompt Formula:
“Create a new image in the same style as [the original image], with similar mood, color palette, and level of detail. Change the composition and subject slightly to feel like a different moment in the same world.”
Examples:
1) Base Prompt:
“A moody cyberpunk street at night with glowing signs, rain, and a lone figure.”
2) Variation Prompt:
“Another scene in the same cyberpunk world, same rainy atmosphere and glowing neon palette, but this time from inside a dimly lit ramen bar looking out onto the street. Keep the same visual style, but vary the composition.”
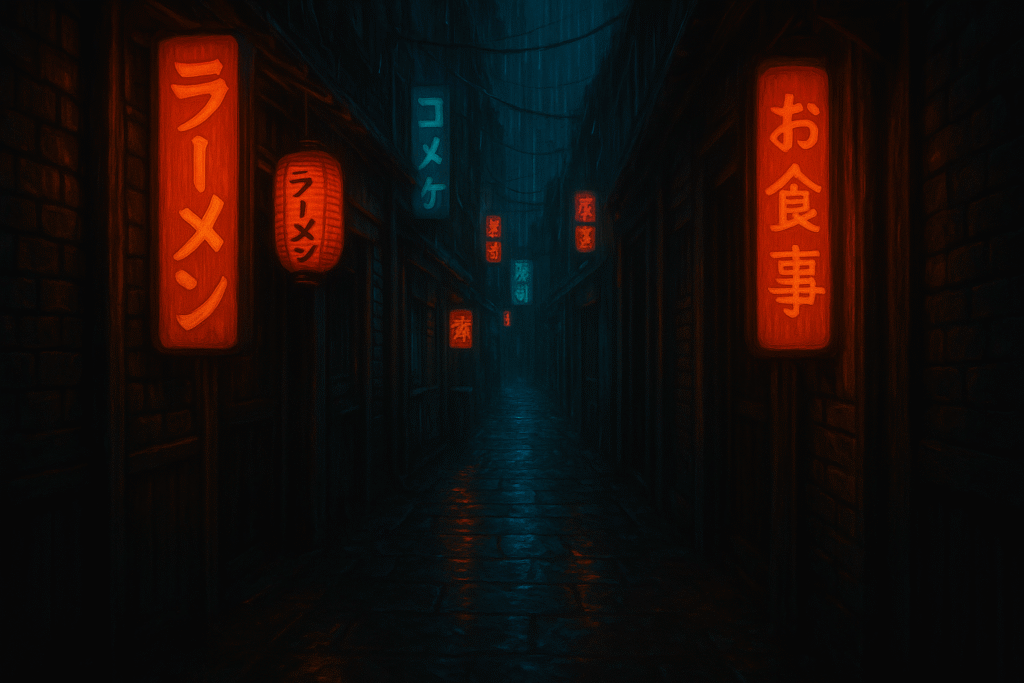
3) Another Variation:
“In the same gritty cyberpunk world, show a quiet alley behind the main street. Maintain the color tones and lighting style, but change the perspective and environment.”
Three images that maintain style consistency while differing in composition:
Image 1:

Image 2:
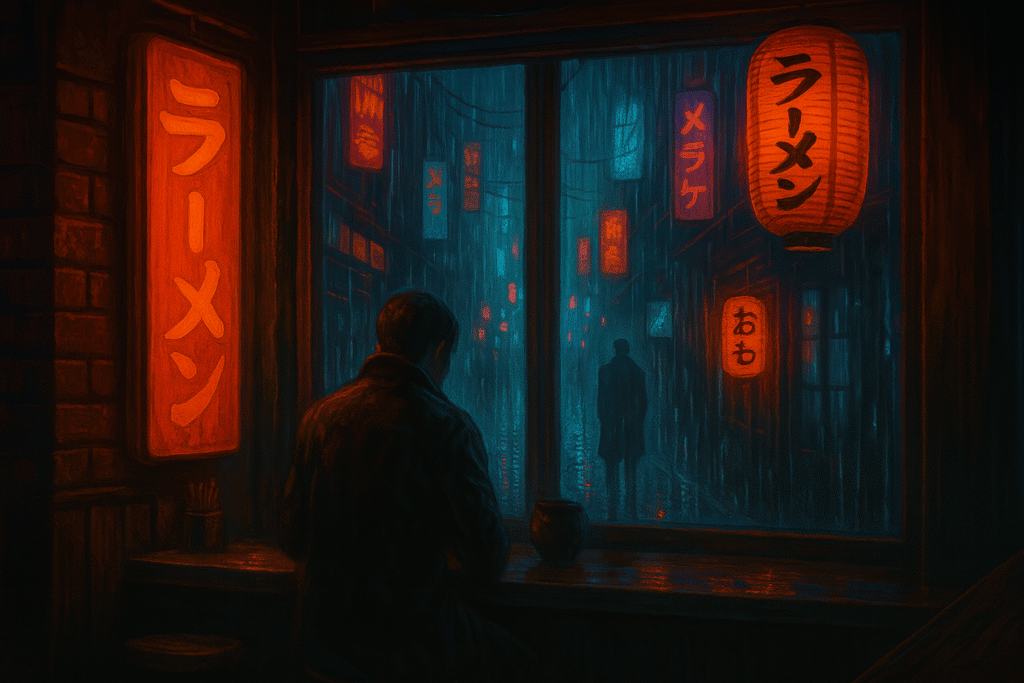
Image 3:
Key Phrases to Use:
- “Another image in the same style”
- “From the same world”
- “With similar colors and lighting”
- “Change the setting slightly”
- “Feels like a different moment, same atmosphere”
Tips:
- Mention what to keep (style, color, tone, vibe)
- Mention what to change (scene, angle, activity)
- Don’t just say “make it similar”—guide it by example
Avoid This:
“Make another one kind of like the last one.”
Use This Instead:
“Make a new image with the same dreamy watercolor style, pastel palette, and peaceful tone—but show a different village nestled in a mountain pass at twilight.”
Closing Thoughts
You now have the skills to turn DALL·E from a clever tool into a creative partner. These advanced strategies will help you unlock image generation with greater consistency, nuance, and purpose.
Each technique is best learned by iteration—start small, then scale. Explore themes, chain prompts, shift styles, or create entire narratives.
Your next image isn’t just a prompt away. It’s a direct result of your visual clarity and storytelling power.
Happy creating.
— Written by a prompt expert and graphic designer who believes words are the new paint.


The race to dominate AI-generated imagery has entered a sharper, more consequential phase. What once felt like a novelty—machines producing surreal, dreamlike visuals—has matured into a serious technological contest with real implications for design workflows, media production, and even digital economies. Two models now sit at the center of that conversation: GPT Image 2 and Nano Banana 2. While both promise high-quality visual synthesis, they reflect very different philosophies about how AI should create, scale, and integrate into modern systems.
This is not just a comparison of outputs. It is a story about where generative AI is heading next.
The Shift From Spectacle to Utility
Early image generators were judged primarily on aesthetics. Could they produce something beautiful, bizarre, or viral? Today, that bar has moved. The real question is whether these models can function as reliable tools inside professional pipelines.
GPT Image 2 represents a continuation of the “generalist powerhouse” approach. It is built to handle a wide range of prompts, styles, and use cases with strong consistency. Whether generating marketing visuals, concept art, or UI mockups, the model aims to be adaptable rather than specialized.
Nano Banana 2, by contrast, is engineered with efficiency and deployment flexibility in mind. It focuses on speed, cost-effectiveness, and edge compatibility. Instead of maximizing raw generative power, it optimizes for environments where compute resources are constrained but responsiveness is critical.
This divergence is what makes the comparison meaningful. These models are not just competing on quality—they are competing on philosophy.
Output Quality: Precision vs. Personality
At first glance, GPT Image 2 tends to produce more refined and compositionally coherent images. It handles lighting, perspective, and object relationships with a level of polish that aligns closely with professional design standards. Text rendering, a long-standing weakness in generative models, is noticeably improved, making it more viable for branding and advertising contexts.
Nano Banana 2, while slightly less consistent in fine detail, often produces outputs with a distinct stylistic character. There is a certain unpredictability that can work in its favor, especially in creative exploration. Designers looking for inspiration rather than precision may find its results more interesting, even when they are less technically perfect.
The difference becomes clear in iterative workflows. GPT Image 2 excels when you know what you want and need the model to execute reliably. Nano Banana 2 shines when you are still discovering what you want and are open to unexpected variations.
Speed and Efficiency: Where Nano Banana 2 Leads
One of the most significant differentiators is performance efficiency. Nano Banana 2 is designed to run faster and with fewer computational demands. This makes it particularly attractive for real-time applications, mobile environments, and decentralized systems where latency and cost are critical factors.
GPT Image 2, while powerful, typically requires more resources to achieve its higher fidelity outputs. In cloud-based environments, this is less of a concern, but at scale, the cost difference becomes meaningful. For startups or platforms generating large volumes of images, Nano Banana 2 offers a compelling economic advantage.
This is where the broader industry trend becomes visible. Not every use case requires maximum quality. In many scenarios, “good enough, instantly” beats “perfect, eventually.”
Prompt Understanding and Control
Prompt interpretation is another area where the models diverge. GPT Image 2 demonstrates stronger semantic understanding, particularly with complex or multi-layered instructions. It can parse nuanced descriptions and translate them into coherent visual outputs with fewer iterations.
Nano Banana 2, while capable, tends to be more sensitive to prompt phrasing. Small changes in wording can lead to significantly different results. This can be frustrating for users seeking consistency, but it also opens the door to more exploratory workflows where variation is desirable.
Control mechanisms also differ. GPT Image 2 leans toward structured prompt engineering, rewarding clarity and specificity. Nano Banana 2 feels more like a creative partner that responds dynamically, sometimes unpredictably, to input.
Integration and Developer Ecosystems
Beyond raw performance, integration is becoming the defining factor in model adoption. GPT Image 2 is typically positioned within a broader ecosystem of AI tools, making it easier to combine with text generation, code assistance, and multimodal workflows. This interconnectedness is valuable for teams building complex applications.
Nano Banana 2, on the other hand, is often favored in modular and lightweight deployments. Its architecture allows developers to integrate it into systems where flexibility and independence from large infrastructures are priorities. This aligns well with the growing interest in edge AI and decentralized applications.
The contrast here reflects two different visions of the future: one centralized and ecosystem-driven, the other distributed and modular.
Use Cases: Choosing the Right Tool
The choice between GPT Image 2 and Nano Banana 2 ultimately depends on the context in which they are used.
GPT Image 2 is better suited for high-stakes visual production. This includes advertising campaigns, brand assets, and any scenario where consistency and quality cannot be compromised. Its ability to interpret complex prompts and deliver polished results makes it a reliable choice for professionals.
Nano Banana 2 finds its strength in high-volume, real-time, or resource-constrained environments. Social media platforms, gaming applications, and mobile tools can benefit from its speed and efficiency. It is also well-suited for experimental creative processes where variation is an asset rather than a drawback.
What is emerging is not a winner-takes-all dynamic, but a segmentation of the market based on needs.
The Economic Layer: Cost as a Strategic Factor
As AI image generation scales, cost is becoming a strategic consideration rather than a technical detail. GPT Image 2’s higher resource requirements translate into higher operational costs, particularly at scale. For enterprises with significant budgets, this may be acceptable in exchange for quality.
Nano Banana 2, however, introduces a different equation. By lowering the cost per generation, it enables entirely new business models. Applications that rely on massive volumes of generated content—such as personalized media feeds or dynamic in-game assets—become more feasible.
This shift could have broader implications for the AI economy. Models that prioritize efficiency may drive wider adoption, even if they are not the absolute best in terms of output quality.
Creative Control vs. Creative Chaos
There is also a philosophical dimension to this comparison. GPT Image 2 embodies control. It is predictable, reliable, and aligned with user intent. This makes it a powerful tool for professionals who need to execute a vision precisely.
Nano Banana 2 embodies a degree of chaos. It introduces variability and surprise, which can be valuable in creative exploration. In some ways, it feels closer to collaborating with another human artist—sometimes aligned, sometimes divergent, but often inspiring.
Neither approach is inherently better. They simply cater to different creative mindsets.
What This Means for the Future of AI Imagery
The emergence of models like GPT Image 2 and Nano Banana 2 signals a broader evolution in generative AI. The field is moving beyond the question of “can AI create images?” to “how should AI create images for different contexts?”
We are likely to see further specialization. Some models will push the boundaries of quality and realism, while others will optimize for speed, cost, and accessibility. Hybrid approaches may also emerge, combining the strengths of both paradigms.
For users, this means more choice—but also more complexity. Selecting the right model will require a clear understanding of priorities, whether that is quality, speed, cost, or creative flexibility.
Conclusion: A Market Defined by Trade-Offs
GPT Image 2 and Nano Banana 2 are not just competing products; they are representations of two different strategies in AI development. One prioritizes excellence and integration, the other efficiency and adaptability.
The real takeaway is not which model is better, but how their differences reflect the changing demands of the market. As AI becomes more embedded in everyday tools and workflows, the ability to balance quality with practicality will define success.
In that sense, this comparison is less about a rivalry and more about a roadmap. The future of AI image generation will not be dominated by a single model, but shaped by a spectrum of solutions designed for a wide range of needs.
And that is where the real innovation begins.
AI Model
From Panels to Motion: A Beginner’s Guide to Turning Comics into Animations with Seedance 2.0

There’s a quiet revolution happening in digital storytelling. For decades, comics and animation lived in parallel worlds—one static, the other fluid. Bridging the gap required teams of artists, animators, and expensive production pipelines. Today, that barrier is dissolving. With tools like Seedance 2.0, creators can transform still comic panels into dynamic animated sequences with far less friction than ever before.
This isn’t just a technical upgrade. It’s a shift in creative power. Indie artists, small studios, and even hobbyists can now breathe motion into their illustrations without needing a full animation background. If you’ve ever looked at a comic panel and imagined it moving—wind rustling through hair, a camera slowly zooming in, a punch landing in slow motion—this guide will walk you through how to make that vision real.
Understanding the Core Idea: Comics as Animation Blueprints
Before diving into software, it’s worth reframing how you think about comics.
A comic is already a form of “compressed animation.” Each panel represents a moment in time, carefully chosen to imply motion between frames. The artist controls pacing, perspective, and emotion using static imagery. What Seedance 2.0 does is expand those implied transitions into actual movement.
Instead of drawing hundreds of frames, you’re guiding an AI to interpolate motion between key visual moments.
This means your job isn’t to become a traditional animator overnight. It’s to think like a director. You’re deciding:
- Where the camera moves
- How characters subtly animate
- What elements remain static versus dynamic
Seedance 2.0 handles the heavy lifting, but your creative direction determines the outcome.
Setting Up Your Workflow
The biggest mistake beginners make is jumping straight into animation without preparing their assets. Clean input leads to dramatically better results.
Start with your comic panels. Ideally, you should have high-resolution images with clear linework and distinct foreground/background separation. If your comic is hand-drawn, scanning at a high DPI is essential. If it’s digital, export in a lossless format like PNG.
Think of each panel as a scene rather than a frame. You’re not animating the entire comic at once—you’re breaking it into manageable sequences.
Once your assets are ready, import them into Seedance 2.0. The platform is designed to recognize structural elements in images, such as characters, depth layers, and lighting cues. This is where AI begins to interpret your artwork.
Layering: The Hidden Key to Good Animation
If there’s one concept that separates amateur results from professional-looking output, it’s layering.
Comics are often drawn as flat compositions, but animation requires depth. Seedance 2.0 allows you to separate elements into layers—even if they weren’t originally drawn that way.
For example, in a panel showing a character standing in a city street, you can divide the image into:
- Foreground (character)
- Midground (street and objects)
- Background (buildings, sky)
Once separated, each layer can move independently. This creates parallax, one of the simplest yet most effective animation techniques. As the camera pans, closer objects move faster than distant ones, giving a sense of depth.
Seedance uses AI-assisted segmentation to help with this process, but beginners should still refine layers manually when needed. Clean edges and logical separation make a huge difference.
Introducing Motion: Subtlety Over Spectacle
One of the most common beginner mistakes is over-animating everything. Movement doesn’t automatically improve a scene. In fact, too much motion can make it feel chaotic or artificial.
Start small.
Instead of trying to animate entire characters, focus on micro-movements. A slight head tilt, blinking eyes, or a gentle shift in posture can bring a character to life without overwhelming the frame.
Seedance 2.0 offers motion presets that can be applied to different elements. These include natural movements like breathing, hair sway, and environmental effects such as wind or light flicker.
Think cinematically. Ask yourself what the viewer should focus on. Then animate only what supports that focus.
Camera Movement: Your Most Powerful Tool
If you do nothing else, learn how to use camera movement effectively. It’s the easiest way to turn a static panel into something dynamic.
Seedance allows you to simulate camera actions like zoom, pan, tilt, and dolly. Even a simple slow zoom can dramatically increase emotional impact.
Imagine a dramatic panel where a character realizes something shocking. Instead of leaving it static, you can:
- Slowly zoom into their face
- Add a slight background blur
- Introduce subtle lighting changes
This transforms a single image into a cinematic moment.
Camera movement also helps connect multiple panels. You can transition from one panel to another by panning across a larger composition or zooming into a specific detail that leads into the next scene.
Timing and Pacing: Where Beginners Struggle Most
Animation isn’t just about movement—it’s about timing.
Seedance 2.0 gives you control over how long each motion lasts and how it accelerates or decelerates. This is known as easing, and it’s critical for natural-looking animation.
A movement that starts and stops abruptly feels robotic. A movement that gradually accelerates and slows down feels organic.
For beginners, the safest approach is to slow everything down. Fast movements are harder to control and often look unnatural when generated automatically.
Let scenes breathe. Give viewers time to absorb the image before transitioning.
Adding Effects: Enhancing, Not Distracting
Once your basic animation is working, you can start adding effects.
Seedance 2.0 includes a range of visual enhancements such as lighting adjustments, particle effects, and atmospheric elements. These can elevate your animation, but only if used carefully.
For example, adding rain to a scene can create mood, but overdoing it can obscure the artwork. Similarly, glowing effects can emphasize important elements but shouldn’t dominate the frame.
Think of effects as seasoning, not the main dish.
Voice, Sound, and Atmosphere
While Seedance focuses primarily on visual animation, sound plays a huge role in making your work feel complete.
Even simple audio can transform your animation. Background ambience, subtle sound effects, and minimal voice acting can add depth.
A static panel of a city becomes alive with distant traffic noise and footsteps. A dramatic close-up gains intensity with a low ambient hum or heartbeat-like rhythm.
You don’t need a full soundtrack. Start with basic layers of sound and build gradually.
Exporting and Optimizing Your Animation
Once your animation is complete, exporting correctly is crucial.
Seedance 2.0 allows you to render in various formats depending on your target platform. Short-form vertical videos work well for social media, while wider formats suit cinematic presentations.
Pay attention to resolution and frame rate. Higher isn’t always better. A well-optimized 24 or 30 FPS animation often looks more natural than overly smooth high-frame-rate output, especially for comic-style visuals.
Compression also matters. You want to maintain image quality without creating massive file sizes.
Common Pitfalls and How to Avoid Them
Beginners often run into the same issues when starting out.
The first is trying to animate low-quality images. If your source material is blurry or poorly defined, the AI will struggle to produce clean motion.
The second is over-reliance on automation. Seedance 2.0 is powerful, but it’s not magic. You still need to guide it with clear creative decisions.
The third is ignoring storytelling. Animation should enhance the narrative, not distract from it. Every movement should have a purpose.
Building a Repeatable Process
Once you’ve completed your first animation, the real advantage comes from refining your workflow.
Create templates for common scene types. Develop a consistent style for camera movement and pacing. Over time, you’ll build a recognizable visual language.
Seedance 2.0 becomes more powerful the more you understand how to direct it. The tool doesn’t replace creativity—it amplifies it.
The Bigger Picture: Why This Matters
Turning comics into animation isn’t just a technical trick. It’s a new storytelling medium.
Creators can now publish hybrid content that sits between traditional comics and full animation. This opens up new distribution channels, from social media to interactive platforms.
It also lowers the barrier to entry for animation as a whole. Instead of needing a studio, a single creator can produce compelling animated stories.
This democratization is already reshaping the creative landscape.
Final Thoughts
Learning to animate comics with Seedance 2.0 is less about mastering software and more about understanding motion, timing, and storytelling.
Start simple. Focus on small improvements. Experiment constantly.
The gap between a static panel and a living scene is smaller than it’s ever been. And for creators willing to explore it, the possibilities are wide open.
What used to take months of production can now be done in days—or even hours. But the real advantage isn’t speed. It’s control.
For the first time, comic artists can fully dictate how their stories move, not just how they look.

For much of the past year, a quiet consensus has been building inside developer circles, research labs, and even among enterprise buyers: Claude might be the best AI model available today. Not the most popular, not the most visible, but the best. It is a claim that surfaces repeatedly in conversations about coding assistants, long-form reasoning, and high-stakes professional use.
Yet the AI market in 2026 is no longer a single race. It is a layered competition between models, products, ecosystems, and distribution channels. A model can dominate benchmarks and still lose in adoption. A chatbot can lead in users and still fall short in precision. And a company can produce elite systems without owning the consumer narrative.
To understand whether Claude deserves the title of “best AI,” we need to break the market into its real dimensions: usage, performance, specialization, and strategic positioning. Only then does the picture come into focus—and it is far more nuanced than the hype suggests.
The Rise of Claude: Precision Over Popularity
Anthropic did not build Claude to win the popularity contest. From its earliest releases, the company positioned itself differently from competitors like OpenAI and Google. Where others pushed aggressively into consumer markets, Anthropic focused on alignment, controllability, and reliability.
That design philosophy has paid off in a specific way. Claude models are widely regarded as unusually consistent. They follow instructions closely, avoid hallucinations more effectively than many competitors, and maintain coherence across long documents. These traits may not produce viral demos, but they matter deeply in professional environments.
Developers often describe Claude as “calm” compared to other models. It is less prone to overconfident speculation and more likely to acknowledge uncertainty. In enterprise settings—where errors can have legal, financial, or operational consequences—that behavior is not just preferable, it is essential.
This is the foundation of Claude’s reputation. It is not the loudest AI. It is the one that quietly gets things right.
The Numbers Game: Claude Is Not the Most Used AI
Despite its growing reputation, Claude is not the most widely used AI system. That title still belongs to ChatGPT, which has achieved a scale that no competitor has yet matched.
ChatGPT’s user base has surged into the hundreds of millions of weekly active users, supported by a massive ecosystem of integrations, plugins, and enterprise deployments. Its visibility is unmatched, and for many users, it remains the default entry point into generative AI.
Google Gemini also operates at a far larger scale than Claude. Integrated across Google’s products—from search to mobile devices—Gemini benefits from distribution that Anthropic simply cannot replicate. Hundreds of millions of users interact with Gemini-powered features, often without consciously choosing to do so.
Claude, by comparison, operates on a smaller footprint. Its direct user base is measured in the tens of millions rather than hundreds of millions. Even when accounting for API usage and enterprise deployments, it does not approach the scale of its rivals.
This matters because usage is not just a vanity metric. It reflects accessibility, ecosystem strength, and default positioning. In that sense, Claude is not leading the market—it is competing from behind.
Benchmarks and Reality: Where Claude Excels
If usage tells one story, benchmarks tell another. On many technical evaluations, Claude performs at the highest level of any available model.
In software engineering benchmarks, Claude consistently ranks at or near the top. Its ability to understand complex codebases, reason through multi-step problems, and generate functional solutions has made it a favorite among developers. Unlike some models that excel at isolated coding tasks, Claude demonstrates strength in sustained workflows, where context and continuity matter.
This is particularly evident in agentic tasks—scenarios where the model must plan, execute, and iterate over multiple steps. Claude’s architecture and training appear well-suited to these challenges, allowing it to maintain coherence across extended interactions.
Beyond coding, Claude performs strongly in reasoning-heavy benchmarks, including those that test mathematical problem-solving, scientific understanding, and multi-domain knowledge. It also excels in long-context tasks, where it can process and analyze large documents without losing track of key details.
These capabilities are not theoretical. They translate directly into real-world applications: legal analysis, financial modeling, research synthesis, and technical writing. In these domains, Claude often feels less like a chatbot and more like a capable collaborator.
The Writing Advantage: A Subtle but Powerful Edge
One of Claude’s most underrated strengths is its writing quality. While many models can generate fluent text, Claude tends to produce output that feels more structured, deliberate, and context-aware.
It handles tone with precision, adapts to nuanced instructions, and maintains consistency over long passages. This makes it particularly valuable for tasks that require more than just surface-level fluency—tasks like drafting reports, editing complex documents, or synthesizing information from multiple sources.
This advantage is not easily captured by benchmarks, but it is widely recognized by users. In professional environments, where clarity and coherence are critical, Claude’s writing ability becomes a decisive factor.
It is one of the reasons why many users who try multiple models eventually settle on Claude for serious work, even if they continue to use other tools for casual interactions.
The Ecosystem Problem: Why Claude Lags in Adoption
If Claude is so strong technically, why does it lag in usage? The answer lies in distribution.
OpenAI has built an ecosystem around ChatGPT that extends far beyond the core model. It includes integrations with productivity tools, developer platforms, and enterprise software. Microsoft’s partnership amplifies this reach, embedding AI capabilities into widely used applications.
Google operates on an even larger scale. Gemini is not just a standalone product; it is part of a broader ecosystem that includes search, email, cloud services, and mobile operating systems. This gives Google a structural advantage in distribution.
Anthropic, by contrast, has a narrower footprint. While it has secured important partnerships and enterprise customers, it lacks a dominant consumer platform. Users must actively choose Claude, rather than encountering it by default.
This creates a paradox. Claude may be preferred by many who use it, but fewer people are exposed to it in the first place. In a market where distribution often determines success, this is a significant disadvantage.
Specialization vs. General Dominance
The question of whether Claude is “the best” depends heavily on how one defines the market.
If the goal is to identify the most capable model for professional tasks—coding, analysis, writing, reasoning—Claude has a strong claim. It combines technical performance with reliability in a way that few competitors match.
If the goal is to identify the most widely used or influential AI system, Claude does not qualify. ChatGPT dominates in visibility and adoption, while Gemini leverages Google’s ecosystem to reach a massive audience.
This distinction highlights a broader trend in AI: the market is fragmenting. Instead of a single dominant model, we are seeing the emergence of specialized leaders.
Claude is becoming the model of choice for high-precision work. ChatGPT remains the general-purpose leader. Gemini excels in integration and accessibility. Each occupies a different position in the landscape.
Enterprise Adoption: A Quiet Victory
While Claude may not lead in consumer usage, it is gaining ground in enterprise environments. Companies that require reliable, controllable AI systems are increasingly turning to Anthropic’s models.
This shift is driven by several factors. Claude’s alignment-focused design reduces the risk of harmful or misleading outputs. Its long-context capabilities enable it to handle complex documents and workflows. And its consistent behavior makes it easier to integrate into existing systems.
These qualities are particularly valuable in regulated industries, where compliance and accuracy are critical. In such contexts, the “best” AI is not the most creative or the fastest—it is the one that can be trusted.
Claude’s growing presence in enterprise settings suggests that its influence may be larger than its consumer footprint implies. It is becoming a backbone technology rather than a front-facing product.
The Benchmark Illusion: Why “Best” Is Contextual
AI benchmarks are often treated as definitive measures of performance, but they can be misleading. Different benchmarks emphasize different skills, and no single model dominates across all of them.
Some tests prioritize reasoning, others coding, others general knowledge. A model that excels in one area may perform less impressively in another. Moreover, benchmarks do not always capture real-world complexity, where tasks are messy, ambiguous, and context-dependent.
This is why the debate over whether Claude is the best AI often leads to conflicting conclusions. Supporters point to its top-tier performance in specific benchmarks. Critics highlight areas where competitors match or exceed it.
The truth is that “best” is not a fixed category. It is a function of use case.
The User Experience Factor
Beyond benchmarks and usage statistics, there is a more subjective dimension to this debate: user experience.
Many users report that Claude simply “feels better” to work with. It is more predictable, more respectful of instructions, and less prone to erratic behavior. These qualities are difficult to quantify, but they have a significant impact on productivity.
In contrast, some competing models are more dynamic but also less consistent. They may produce impressive outputs in one instance and flawed ones in another. For casual use, this variability may be acceptable. For professional work, it is often not.
Claude’s emphasis on stability gives it an edge in scenarios where reliability matters more than novelty.
The Future of the AI Race
The AI market is evolving rapidly, and today’s leaders may not remain on top. New models, new architectures, and new training methods are constantly reshaping the landscape.
Anthropic continues to refine Claude, pushing its capabilities further while maintaining its focus on alignment and safety. OpenAI is expanding ChatGPT’s ecosystem and introducing new features at a rapid pace. Google is integrating Gemini more deeply into its products, leveraging its unparalleled distribution network.
This competition is driving innovation at an extraordinary pace. It is also making it increasingly difficult to declare a single “best” AI.
Instead, the market is moving toward a multi-model reality, where different systems excel in different roles.
Final Verdict: Is Claude the Best AI?
Claude is not the most popular AI. It does not have the largest user base or the broadest distribution. In terms of market dominance, it trails behind ChatGPT and Gemini.
But popularity is not the same as quality.
In terms of technical performance, reliability, and professional utility, Claude stands at the very top tier of AI models. For certain use cases—especially coding, document analysis, and structured writing—it may indeed be the best option available.
The more accurate conclusion is this: Claude is not the best AI for everyone, but it may be the best AI for the users who matter most in high-value, precision-driven work.
That distinction may ultimately prove more important than raw user numbers.
-
 AI Model9 months ago
Tutorial: How to Enable and Use ChatGPT’s New Agent Functionality and Create Reusable Prompts
-
 AI Model9 months ago
Tutorial: Mastering Painting Images with Grok Imagine
-

 AI Model7 months ago
How to Use Sora 2: The Complete Guide to Text‑to‑Video Magic
-
 Tutorial7 months ago
From Assistant to Agent: How to Use ChatGPT Agent Mode, Step by Step
-

 AI Model10 months ago
Complete Guide to AI Image Generation Using DALL·E 3
-
 AI Model12 months ago
Crafting Effective Prompts: Unlocking Grok’s Full Potential
-

 News10 months ago
Anthropic Tightens Claude Code Usage Limits Without Warning
-

 News7 months ago
OpenAI’s Bold Bet: A TikTok‑Style App with Sora 2 at Its Core