Tutorial
Using Nano Banana: Step by Step
- Share
- Tweet /data/web/virtuals/375883/virtual/www/domains/spaisee.com/wp-content/plugins/mvp-social-buttons/mvp-social-buttons.php on line 63
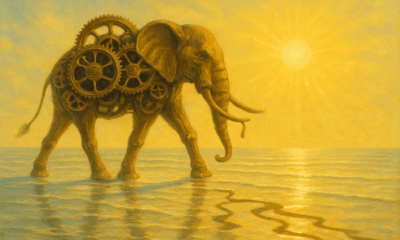
https://spaisee.com/wp-content/uploads/2025/10/google_nano_banana_2.png&description=Using Nano Banana: Step by Step', 'pinterestShare', 'width=750,height=350'); return false;" title="Pin This Post">
Nano Banana (Gemini 2.5 Flash Image) is Google DeepMind’s advanced AI model for image editing and generation. Unlike traditional “text-to-image” generators, its main focus is editing existing images with natural language instructions. That means you can take your own photo (or any picture), describe what you want changed, and Nano Banana will modify the image — while keeping the rest intact.
It has become especially known for:
- Consistency: Characters, faces, and objects stay recognizable across edits.
- Precision: You can make small, localized changes without the entire image shifting.
- Creativity: It can blend multiple images, swap backgrounds, or apply stylistic transformations.
- Accessibility: Because you don’t need advanced editing skills — plain text instructions are enough.
This makes Nano Banana both a creative tool for designers / artists and a practical tool for casual users who just want to tweak a picture without learning Photoshop-level skills.
Key Features & Capabilities
Here are the standout features, explained simply:
- Natural language editing
- Type what you want changed, and it edits accordingly (e.g. “make the sky stormy,” “remove the person on the right”).
- Subject / character consistency
- Maintains identity of people, pets, or objects across edits. Faces and proportions remain stable.
- Scene preservation
- Only modifies what you ask for — background, lighting, and perspective stay coherent.
- Pixel-level / localized edits
- You can target very small changes (change shirt color, fix hair, remove a lamp) without disturbing the whole image.
- Multi-image blending
- Upload two or more images and combine them into one (e.g. put a person from Image A into the setting of Image B).
- One-shot editing efficiency
- Often gets the edit right on the first attempt, with less back-and-forth prompting.
- Batch processing
- Apply the same edit across multiple images for consistent results (useful for branding or content series).
- Stylization & transfer
- Apply artistic styles, moods, or textures from one image onto another.
- Integration with tools
- Works inside the Gemini app, Google AI Studio, and some creative apps (e.g. Photoshop plugin beta).
- Provenance watermarking
- Uses invisible “SynthID” watermarking to mark AI-generated edits responsibly.
- Limits / caveats
- Cropping and very extreme edits can sometimes be unreliable.
- Ambiguous prompts may confuse the model or cause it to “revert” to original imagery.
How to Use Nano Banana (Step by Step)
Step 1: Open the tool
- In the Gemini app (mobile or web), go to the image editing section.
- Or in Google AI Studio, select Gemini 2.5 Flash Image.
- Some apps (like Photoshop beta) let you use Nano Banana inside their interface.

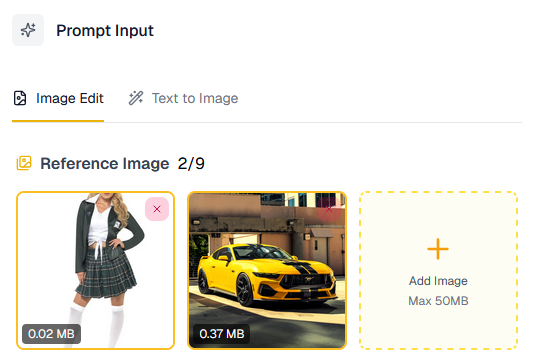
Let’s upload two images: A girl and a car.


Step 2: Upload your base image(s)
- For single edits, upload one photo.
- For blending/fusion, upload 2–3 reference images (e.g. “use this background with this person”).
Step 3: Write your prompt
Be clear and descriptive. Mention what to change, what to keep, and what style you want.
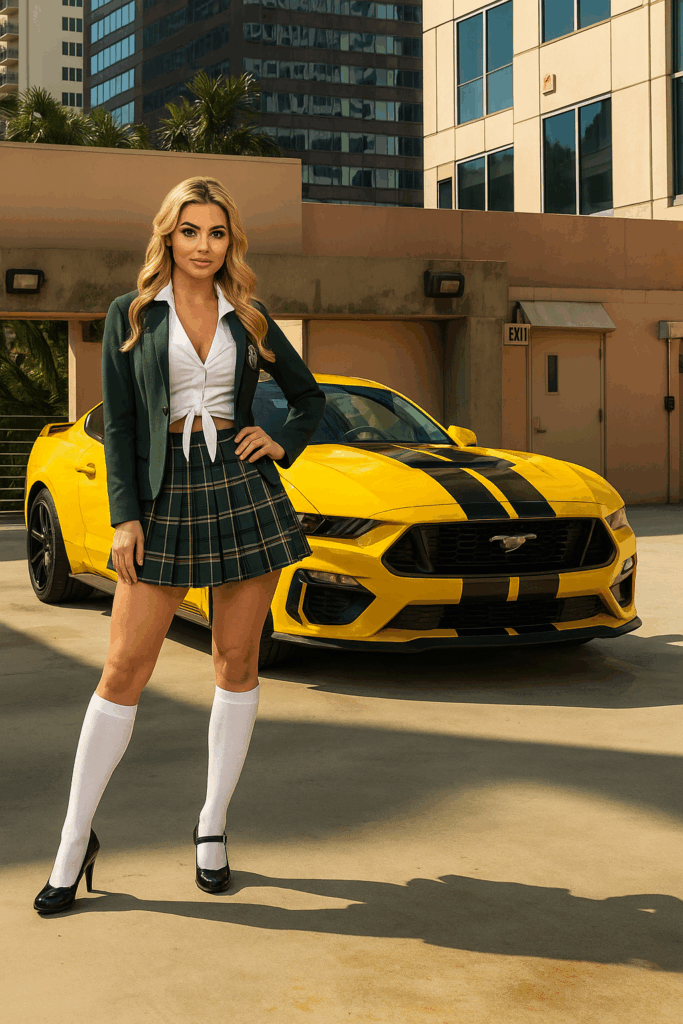
- Example: “The girl will stand in front of the car, pretending it’s hers, and pose for a photo.”
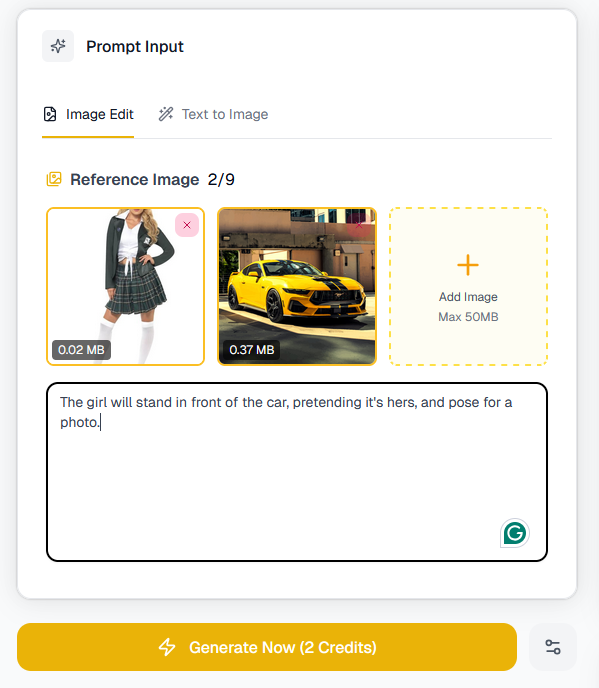
Step 4: Generate
Click Generate/Edit. The model will produce 1–4 variations, depending on the platform.
You will get an image like this.
Step 5: Refine if needed
You can add follow-up prompts like:
- “Make the sky more dramatic with purple tones.”
- “Fix the hand so it looks more natural.”
- “Add soft shadows under the added objects.”
Step 6: Save or batch apply
- Export your favorite version.
- Or apply the same edit to multiple photos (batch mode).
Example Prompts
Here’s a range of examples — from simple fixes to creative experiments.
🔹 Basic Fixes
- “Remove the person in the background.”
- “Brighten the photo, adjust lighting to golden hour.”
- “Change the red shirt to a navy blue sweater.”
🔹 Creative Background Swaps
- “Put me in a snowy mountain scene, with warm winter lighting.”
- “Replace the background with a Japanese cherry blossom park.”
- “Make the photo look like it was taken inside a sci-fi spaceship.”
🔹 Style & Mood
- “Turn this portrait into a watercolor painting.”
- “Make it look cinematic, with dramatic shadows.”
- “Apply an 80s retro aesthetic with neon colors.”
🔹 Multi-Image Fusion
- “Take the dog from Image A and place it in the garden from Image B.”
- “Blend the city skyline from this photo with the night sky from the other one.”
- “Use the outfit from Image A on the person in Image B.”
🔹 Fun Transformations
- “Turn this person into a Pixar-style 3D character.”
- “Make it look like a clay stop-motion figurine.”
- “Add a futuristic hologram effect over the laptop screen.”
Tips & Tricks (Pro User Guide)
Here are practical tricks for getting the best results:
- Be specific
- Instead of: “Make it better” → Say: “Sharpen the face, soften the background blur, adjust lighting to warm tones.”
- Lock the identity
- Add instructions like: “Keep the person’s face exactly the same” or “Do not change hairstyle or expression.”
- Iterate in steps
- Complex edits work best when broken into smaller instructions. Example:
- First: “Change background to Paris street at night.”
- Then: “Add glowing street lamps.”
- Finally: “Put an umbrella in their hand.”
- Complex edits work best when broken into smaller instructions. Example:
- Use style cues
- Add phrases like “in cinematic style,” “as an oil painting,” “soft pastel tones” to control aesthetics.
- Fix mistakes with direct instructions
- If hands, eyes, or details glitch, try: “Fix the right hand so it has 5 fingers, natural skin texture.”
- Work with references
- When blending, always upload reference images so the model knows exactly what you mean.
- Batch smartly
- If editing 20 photos for social media, define your look once, then apply to all in batch.
- Test small before full
- Run a crop of your photo to refine the prompt before applying edits to the full-resolution image.
- Negative prompts
- You can often say: “Don’t change the hair” or “Leave the sky untouched” to lock areas.
- Post-check for artifacts
- Zoom in — if edges look off, ask: “Blend edges more softly” or “Fix lighting consistency.”
Limitations
- Cropping can be unreliable — it sometimes refuses or glitches.
- Extreme changes (e.g. “turn day into midnight during a snowstorm in space”) may produce artifacts.
- Ambiguous prompts can confuse the model. Always clarify.
- Fine details (hands, jewelry, text) sometimes require manual cleanup.
Why Use Nano Banana?
Use it when you want to:
- Quickly edit photos without Photoshop skills.
- Maintain consistency across a set of images (great for creators and brands).
- Experiment with background swaps and stylizations.
- Prototype ideas, concepts, or designs visually in seconds.
Nano Banana is best thought of as a natural-language photo editor with creative superpowers. It won’t replace a professional retoucher entirely, but it massively lowers the barrier for making polished, creative, and consistent edits.

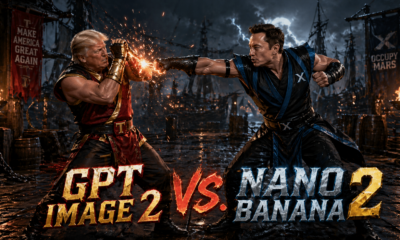


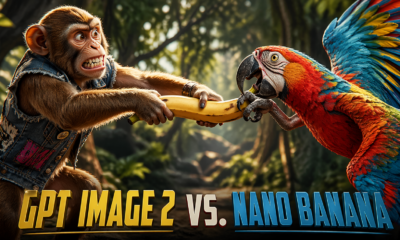


The race to dominate AI-generated imagery has entered a sharper, more consequential phase. What once felt like a novelty—machines producing surreal, dreamlike visuals—has matured into a serious technological contest with real implications for design workflows, media production, and even digital economies. Two models now sit at the center of that conversation: GPT Image 2 and Nano Banana 2. While both promise high-quality visual synthesis, they reflect very different philosophies about how AI should create, scale, and integrate into modern systems.
This is not just a comparison of outputs. It is a story about where generative AI is heading next.
The Shift From Spectacle to Utility
Early image generators were judged primarily on aesthetics. Could they produce something beautiful, bizarre, or viral? Today, that bar has moved. The real question is whether these models can function as reliable tools inside professional pipelines.
GPT Image 2 represents a continuation of the “generalist powerhouse” approach. It is built to handle a wide range of prompts, styles, and use cases with strong consistency. Whether generating marketing visuals, concept art, or UI mockups, the model aims to be adaptable rather than specialized.
Nano Banana 2, by contrast, is engineered with efficiency and deployment flexibility in mind. It focuses on speed, cost-effectiveness, and edge compatibility. Instead of maximizing raw generative power, it optimizes for environments where compute resources are constrained but responsiveness is critical.
This divergence is what makes the comparison meaningful. These models are not just competing on quality—they are competing on philosophy.
Output Quality: Precision vs. Personality
At first glance, GPT Image 2 tends to produce more refined and compositionally coherent images. It handles lighting, perspective, and object relationships with a level of polish that aligns closely with professional design standards. Text rendering, a long-standing weakness in generative models, is noticeably improved, making it more viable for branding and advertising contexts.
Nano Banana 2, while slightly less consistent in fine detail, often produces outputs with a distinct stylistic character. There is a certain unpredictability that can work in its favor, especially in creative exploration. Designers looking for inspiration rather than precision may find its results more interesting, even when they are less technically perfect.
The difference becomes clear in iterative workflows. GPT Image 2 excels when you know what you want and need the model to execute reliably. Nano Banana 2 shines when you are still discovering what you want and are open to unexpected variations.
Speed and Efficiency: Where Nano Banana 2 Leads
One of the most significant differentiators is performance efficiency. Nano Banana 2 is designed to run faster and with fewer computational demands. This makes it particularly attractive for real-time applications, mobile environments, and decentralized systems where latency and cost are critical factors.
GPT Image 2, while powerful, typically requires more resources to achieve its higher fidelity outputs. In cloud-based environments, this is less of a concern, but at scale, the cost difference becomes meaningful. For startups or platforms generating large volumes of images, Nano Banana 2 offers a compelling economic advantage.
This is where the broader industry trend becomes visible. Not every use case requires maximum quality. In many scenarios, “good enough, instantly” beats “perfect, eventually.”
Prompt Understanding and Control
Prompt interpretation is another area where the models diverge. GPT Image 2 demonstrates stronger semantic understanding, particularly with complex or multi-layered instructions. It can parse nuanced descriptions and translate them into coherent visual outputs with fewer iterations.
Nano Banana 2, while capable, tends to be more sensitive to prompt phrasing. Small changes in wording can lead to significantly different results. This can be frustrating for users seeking consistency, but it also opens the door to more exploratory workflows where variation is desirable.
Control mechanisms also differ. GPT Image 2 leans toward structured prompt engineering, rewarding clarity and specificity. Nano Banana 2 feels more like a creative partner that responds dynamically, sometimes unpredictably, to input.
Integration and Developer Ecosystems
Beyond raw performance, integration is becoming the defining factor in model adoption. GPT Image 2 is typically positioned within a broader ecosystem of AI tools, making it easier to combine with text generation, code assistance, and multimodal workflows. This interconnectedness is valuable for teams building complex applications.
Nano Banana 2, on the other hand, is often favored in modular and lightweight deployments. Its architecture allows developers to integrate it into systems where flexibility and independence from large infrastructures are priorities. This aligns well with the growing interest in edge AI and decentralized applications.
The contrast here reflects two different visions of the future: one centralized and ecosystem-driven, the other distributed and modular.
Use Cases: Choosing the Right Tool
The choice between GPT Image 2 and Nano Banana 2 ultimately depends on the context in which they are used.
GPT Image 2 is better suited for high-stakes visual production. This includes advertising campaigns, brand assets, and any scenario where consistency and quality cannot be compromised. Its ability to interpret complex prompts and deliver polished results makes it a reliable choice for professionals.
Nano Banana 2 finds its strength in high-volume, real-time, or resource-constrained environments. Social media platforms, gaming applications, and mobile tools can benefit from its speed and efficiency. It is also well-suited for experimental creative processes where variation is an asset rather than a drawback.
What is emerging is not a winner-takes-all dynamic, but a segmentation of the market based on needs.
The Economic Layer: Cost as a Strategic Factor
As AI image generation scales, cost is becoming a strategic consideration rather than a technical detail. GPT Image 2’s higher resource requirements translate into higher operational costs, particularly at scale. For enterprises with significant budgets, this may be acceptable in exchange for quality.
Nano Banana 2, however, introduces a different equation. By lowering the cost per generation, it enables entirely new business models. Applications that rely on massive volumes of generated content—such as personalized media feeds or dynamic in-game assets—become more feasible.
This shift could have broader implications for the AI economy. Models that prioritize efficiency may drive wider adoption, even if they are not the absolute best in terms of output quality.
Creative Control vs. Creative Chaos
There is also a philosophical dimension to this comparison. GPT Image 2 embodies control. It is predictable, reliable, and aligned with user intent. This makes it a powerful tool for professionals who need to execute a vision precisely.
Nano Banana 2 embodies a degree of chaos. It introduces variability and surprise, which can be valuable in creative exploration. In some ways, it feels closer to collaborating with another human artist—sometimes aligned, sometimes divergent, but often inspiring.
Neither approach is inherently better. They simply cater to different creative mindsets.
What This Means for the Future of AI Imagery
The emergence of models like GPT Image 2 and Nano Banana 2 signals a broader evolution in generative AI. The field is moving beyond the question of “can AI create images?” to “how should AI create images for different contexts?”
We are likely to see further specialization. Some models will push the boundaries of quality and realism, while others will optimize for speed, cost, and accessibility. Hybrid approaches may also emerge, combining the strengths of both paradigms.
For users, this means more choice—but also more complexity. Selecting the right model will require a clear understanding of priorities, whether that is quality, speed, cost, or creative flexibility.
Conclusion: A Market Defined by Trade-Offs
GPT Image 2 and Nano Banana 2 are not just competing products; they are representations of two different strategies in AI development. One prioritizes excellence and integration, the other efficiency and adaptability.
The real takeaway is not which model is better, but how their differences reflect the changing demands of the market. As AI becomes more embedded in everyday tools and workflows, the ability to balance quality with practicality will define success.
In that sense, this comparison is less about a rivalry and more about a roadmap. The future of AI image generation will not be dominated by a single model, but shaped by a spectrum of solutions designed for a wide range of needs.
And that is where the real innovation begins.

Artificial intelligence is no longer a speculative frontier—it is a daily habit. What began as a niche productivity experiment has rapidly transformed into a global behavioral shift, with hundreds of millions of people now interacting with AI systems every single day. The speed of adoption is unprecedented, rivaling or surpassing the early growth curves of social media and smartphones. Yet beneath the surface of viral usage lies a more complex reality: fragmented monetization, uneven user engagement, and an intensifying competition between a handful of dominant platforms.
This article explores the real scale of AI adoption—how many people are actually using these tools daily, how much they are paying (and to whom), what features are driving demand, and where the next phase of growth is headed.
The Scale of Daily AI Usage
The most striking feature of the current AI wave is not just its size, but its frequency. Unlike previous technologies that users might engage with sporadically, AI assistants are becoming embedded into daily workflows.
At the center of this shift is ChatGPT, which remains the most widely used AI product globally. By early 2026, estimates place ChatGPT’s weekly active users well above 500 million, with daily active users commonly cited in the range of 180–250 million. This puts it in the same behavioral category as major consumer platforms—something people check repeatedly throughout the day rather than occasionally.
Google’s Gemini has leveraged its distribution advantage across Android, Search, and Workspace to rapidly scale. While exact numbers are less transparent, analysts estimate Gemini’s daily reach—including passive exposure through Google products—exceeds 300 million users, though active conversational usage is lower.
Meanwhile, Claude has carved out a distinct niche among developers, researchers, and enterprise users. Claude’s daily active user base is smaller—likely in the tens of millions—but its engagement depth is significantly higher, especially for long-form reasoning tasks.
Beyond these three, Microsoft’s AI ecosystem, particularly Copilot integrations across Windows and Office, reaches hundreds of millions of users indirectly. However, usage here is often ambient rather than intentional, blurring the definition of “active user.”
Taken together, conservative estimates suggest that over 700 million people globally interact with AI systems daily, whether directly through chat interfaces or indirectly through embedded features.
From Free to Paid: The Monetization Gap
Despite massive adoption, monetization remains uneven. Most users still access AI for free, but the paying segment—while smaller—is growing rapidly and generating significant revenue.
ChatGPT leads in consumer monetization. Its premium tier, typically priced around $20 per month, has attracted millions of subscribers. Estimates suggest that between 8% and 12% of active users pay for premium features, translating to roughly 15–25 million paying users globally. This alone generates billions in annualized revenue.
Gemini follows a different strategy. Rather than relying heavily on standalone subscriptions, Google bundles AI features into existing products such as Google One and Workspace. This makes it harder to isolate direct AI revenue, but industry estimates suggest Gemini contributes several billion dollars annually through bundled subscriptions and enterprise contracts.
Claude, backed by Anthropic, focuses more heavily on enterprise and API-driven revenue. Its consumer subscription base is smaller, but its enterprise pricing—often usage-based—means higher revenue per user. Claude is particularly strong in industries requiring large context windows and safer outputs, such as legal, finance, and research.
Across the industry, total annual spending on generative AI services (consumer + enterprise) is estimated to exceed $45–60 billion as of 2026, with projections suggesting this could triple within three years.
Revenue Per Product: Who Is Actually Making Money?
Breaking down revenue by product reveals a more nuanced picture of the AI economy.
ChatGPT remains the dominant direct-to-consumer revenue engine. Its subscription model is straightforward, scalable, and globally accessible. Annualized revenue estimates for ChatGPT alone range between $8–12 billion, depending on growth assumptions and enterprise deals.
Gemini’s revenue is more distributed. Because it is embedded across Google’s ecosystem, its financial impact is partially reflected in increased retention, higher subscription tiers, and improved ad targeting rather than direct subscription fees. Analysts estimate Gemini-related revenue contributions at $5–10 billion annually, though this number is less precise.
Claude’s revenue is smaller in absolute terms but growing rapidly. With strong enterprise adoption and API usage, Anthropic’s annual revenue is estimated in the $2–4 billion range, with a trajectory that could accelerate as enterprise AI spending increases.
Microsoft’s Copilot ecosystem represents another major revenue stream, particularly through enterprise licensing. Copilot for Microsoft 365 alone commands a premium price per user, often exceeding $30 per month in enterprise contexts. Total Copilot-related revenue is estimated to be $10+ billion annually, making Microsoft one of the largest monetizers of AI despite not leading in standalone chatbot usage.
What Users Actually Want
The most demanded AI capabilities are surprisingly consistent across platforms, even as models become more advanced.
First and foremost is text generation and rewriting. Whether drafting emails, summarizing documents, or generating reports, this remains the most common use case. The reason is simple: it delivers immediate, tangible productivity gains.
Second is coding assistance. Developers have become some of the most engaged AI users, relying on tools for code generation, debugging, and explanation. This segment is also one of the highest-paying, as professional users are more willing to subscribe.
Third is research and summarization. AI tools are increasingly used to digest large volumes of information quickly. This is especially valuable in business, academia, and journalism, where time-to-insight matters.
Fourth is creative generation, including images, videos, and storytelling. While highly visible, this category generates less revenue per user compared to productivity use cases, though it drives engagement and virality.
Interestingly, voice interaction is emerging as a rapidly growing category. As AI assistants become more conversational and real-time, usage patterns are shifting from typing to speaking, particularly on mobile devices.
The Engagement Divide: Casual vs Power Users
Not all users engage with AI in the same way. The market is increasingly divided into two distinct groups.
Casual users interact with AI occasionally, often for simple queries or entertainment. They are less likely to pay and more likely to churn between platforms.
Power users, on the other hand, integrate AI deeply into their daily workflows. They use it for work, learning, and decision-making. This group is smaller but significantly more valuable, both in terms of revenue and feedback loops.
Power users are also shaping product development. Features such as longer context windows, file uploads, memory, and tool integrations are driven largely by this segment’s needs.
Enterprise Adoption: The Real Growth Engine
While consumer usage dominates headlines, enterprise adoption is where the largest financial stakes lie.
Companies are rapidly integrating AI into internal workflows, customer service, and product offerings. Unlike consumers, enterprises are willing to pay substantial amounts for reliability, security, and customization.
Industries leading adoption include:
- Software development and IT services
- Financial services
- Legal and compliance
- Marketing and content production
Enterprise AI spending is expected to surpass $100 billion annually by the end of the decade, making it the primary driver of long-term revenue growth.
The Economics of AI: Cost vs Revenue
One of the defining tensions in the AI industry is the gap between usage and profitability.
Running large AI models is expensive. Compute costs, infrastructure, and ongoing training require massive capital investment. Even with subscription revenue, margins remain under pressure.
This has led to several strategic responses:
Companies are pushing users toward paid tiers by limiting free usage. They are optimizing models for efficiency, reducing inference costs. They are also exploring new revenue streams, including advertising, enterprise licensing, and API usage.
The long-term viability of current pricing models remains an open question. Some analysts believe subscription prices will rise, while others expect a shift toward bundled or usage-based pricing.
Competitive Dynamics: A Three-Way Battle
The AI market is increasingly defined by three major players: OpenAI, Google, and Anthropic, with Microsoft acting as both a partner and competitor.
OpenAI’s strength lies in product simplicity and brand recognition. ChatGPT has become synonymous with AI for many users, giving it a powerful distribution advantage.
Google’s strength is ecosystem integration. Gemini benefits from being embedded across billions of devices and services, making it ubiquitous even when users are not consciously choosing it.
Anthropic’s strength is specialization. Claude excels in areas requiring deep reasoning, safety, and long-context processing, making it particularly attractive to enterprise users.
Microsoft’s role is unique. By integrating AI into widely used productivity tools, it captures value at the infrastructure and workflow level rather than through standalone apps.
Emerging Trends Shaping the Next Phase
Several key trends are beginning to define the next stage of AI adoption.
One major trend is multimodal interaction. Users increasingly expect AI to handle text, images, audio, and video seamlessly. This is transforming AI from a chatbot into a general-purpose interface.
Another trend is agent-based workflows. Instead of responding to individual prompts, AI systems are beginning to execute multi-step tasks autonomously. This has profound implications for productivity and labor.
A third trend is personalization. AI systems are becoming more tailored to individual users, remembering preferences and adapting over time. This increases both engagement and switching costs.
Finally, there is a growing emphasis on trust and safety. As AI becomes more integrated into critical workflows, reliability and transparency are becoming key differentiators.
Regional Differences in Adoption
AI adoption is not uniform across the globe.
North America leads in both usage and monetization, driven by high purchasing power and early access to new technologies.
Europe shows strong adoption in enterprise contexts but more regulatory caution, particularly around data privacy.
Asia represents the largest growth opportunity. Countries like India and Indonesia are seeing rapid increases in AI usage, driven by mobile-first populations and growing digital economies.
China operates largely within its own ecosystem, with domestic AI platforms dominating usage.
The Future: From Tool to Infrastructure
The most important shift underway is conceptual. AI is moving from being a tool to becoming infrastructure.
Just as the internet became an invisible layer underlying modern life, AI is on track to become a default interface for interacting with information, software, and services.
This transition has several implications.
First, competition will shift from individual apps to ecosystems. The winners will not just be the best models, but the best-integrated platforms.
Second, monetization will diversify. Subscriptions will remain important, but new models—advertising, transactions, and enterprise services—will play a larger role.
Third, user expectations will continue to rise. What feels impressive today will become baseline tomorrow.
Conclusion: A Market Still in Formation
AI adoption has reached a scale that would have seemed improbable just a few years ago. Hundreds of millions of daily users, tens of billions in annual revenue, and a rapidly expanding set of use cases have firmly established AI as a core part of the digital economy.
Yet the market is still in its early stages. Monetization models are evolving, competitive dynamics are fluid, and user behavior is still being shaped.
What is clear, however, is that AI is no longer optional. It is becoming a fundamental layer of how people work, learn, and interact with technology.
The next phase will not be defined by whether people use AI, but by how deeply it integrates into their lives—and which companies succeed in becoming indispensable along the way.

In the increasingly crowded universe of AI image generators, most tools can create a stunning single image. Far fewer can tell a visual story. Even fewer can maintain a character’s face, outfit, proportions, and emotional tone across a sequence of prompts without collapsing into inconsistency. That is where Nano Banana 2 has carved out its reputation.
Nano Banana 2 is not just another text-to-image model. It is a character-coherent visual engine designed for creators who think in series rather than snapshots. Whether you are building a comic strip, a branded mascot campaign, a multi-panel explainer, or a cinematic storyboard, Nano Banana 2 excels at maintaining continuity.
This in-depth guide explores how to use Nano Banana 2 effectively, the most powerful prompt structures, real-world examples, and the advanced techniques that experienced users rely on. If you want predictable, controllable, and repeatable outputs instead of visual roulette, this is your roadmap.
What Makes Nano Banana 2 Different
Before diving into tactics, it’s important to understand where Nano Banana 2 stands out.
Most image models optimize for diversity. They reinterpret the prompt from scratch each time. Nano Banana 2, by contrast, emphasizes contextual continuity. When prompted correctly, it can:
- Maintain the same character design across multiple generations
- Preserve wardrobe details and accessories
- Keep facial structure and expressions consistent
- Track emotional tone across scenes
- Remember environmental style cues
- Maintain camera language and lighting direction
This makes it particularly strong for serialized storytelling, brand mascots, comics, educational explainers, and marketing assets that require visual consistency.
The key to unlocking these capabilities lies in how you structure prompts.
The Core Principle: Treat It Like a Production Pipeline
Nano Banana 2 performs best when you think like a director, not a prompter.
Instead of describing a scene from scratch every time, you establish a “character blueprint” and then evolve it scene by scene. The model responds well to:
- Repeated descriptive anchors
- Named characters
- Consistent style descriptors
- Persistent wardrobe and accessory language
- Structured scene progression
Think of your first prompt as a casting decision. Everything after that is a scene change, not a reinvention.
How to Create Character Consistency Across Multiple Images
This is Nano Banana 2’s strongest capability and the feature most used by advanced creators.
Step 1: Create a Character Anchor Prompt
Your first image should define the character with precision and permanence. Avoid vague language.
Instead of:
“A cool hacker girl in a hoodie.”
Use:
“Lena Park, 26-year-old cybersecurity analyst, sharp jawline, almond-shaped dark brown eyes, short asymmetrical black bob haircut, faint scar on left eyebrow, oversized charcoal hoodie with neon blue lining, black cargo pants, silver chain necklace, confident but calm expression, cinematic lighting, semi-realistic digital illustration.”
You are not just describing a person. You are defining a reproducible identity.
Generate and lock this image.
Step 2: Reference the Character by Name
When creating the next image, reuse the identity anchor:
“Lena Park standing on a rooftop at night overlooking a futuristic city skyline, wearing the same oversized charcoal hoodie with neon blue lining and black cargo pants, wind blowing through her short asymmetrical black bob haircut, focused expression, cinematic night lighting.”
Notice the phrase “wearing the same…” This reinforces continuity.
Nano Banana 2 responds extremely well to repetition of defining attributes.
Step 3: Keep Core Traits Stable
Do not subtly alter key descriptors unless you want evolution. If you remove “short asymmetrical black bob haircut” in later prompts, the model may drift.
Consistency formula:
Character Name
Age (optional but useful)
Facial structure
Hair style
Signature clothing
Signature accessory
Emotional baseline
Advanced Prompt Engineering Techniques
1. The Blueprint Block Method
Experienced users create a “blueprint block” and paste it into every prompt.
Example:
Character Blueprint:
Lena Park, 26-year-old cybersecurity analyst, almond-shaped dark brown eyes, short asymmetrical black bob haircut, faint scar on left eyebrow, oversized charcoal hoodie with neon blue lining, black cargo pants, silver chain necklace.
Scene Prompt:
Lena Park inside a high-tech command center filled with holographic displays, focused expression, cinematic side lighting, shallow depth of field.
This dramatically reduces visual drift.
2. Environmental Continuity Control
Nano Banana 2 also maintains environmental consistency if you treat locations like characters.
Define:
“Abandoned subway station with cracked concrete pillars, flickering fluorescent lights, graffiti-covered walls in teal and orange tones, puddles reflecting light, cinematic moody atmosphere.”
Then reuse:
“Inside the same abandoned subway station with cracked concrete pillars and flickering fluorescent lights…”
It preserves lighting tone and architecture surprisingly well when reinforced.
3. Emotional Arc Tracking
One under-discussed strength of Nano Banana 2 is emotional continuity.
If you define a character’s baseline emotion, then gradually adjust it, the changes feel organic.
Example progression:
Prompt 1: “Lena Park confident and composed.”
Prompt 2: “Lena Park slightly tense, jaw tightened.”
Prompt 3: “Lena Park visibly distressed, eyes wide but determined.”
The facial transition remains coherent instead of generating a completely different face.
Best Tips and Tricks from Power Users
Below are the most frequently cited techniques used by experienced Nano Banana 2 creators.
Use Repetition Intentionally
Repetition is not redundancy. It is reinforcement.
If something matters visually, repeat it:
- Hair style
- Clothing
- Lighting type
- Camera lens style
- Mood keywords
Nano Banana 2 interprets omission as permission to reinterpret.
Avoid Overloading With Style Conflicts
Do not combine:
“hyperrealistic cinematic portrait, watercolor painting, 3D Pixar style, photorealistic DSLR shot”
Conflicting style descriptors increase variability.
Pick one dominant style and stick with it across generations.
Lock the Camera Language
If you want a series to feel cohesive, specify:
- Close-up portrait
- Medium shot
- Wide cinematic frame
- 35mm lens
- Shallow depth of field
For example:
“Medium shot, eye-level camera, cinematic lighting, shallow depth of field.”
Repeating this keeps visual grammar stable.
Maintain Color Palettes Across Scenes
Nano Banana 2 responds well to color direction.
Example:
“Color palette dominated by teal and orange tones.”
Reusing this across scenes ensures visual cohesion.
Example: Creating a Three-Panel Cyberpunk Story
Let’s build a mini-sequence.
Panel 1 – Introduction
“Lena Park, 26-year-old cybersecurity analyst, almond-shaped dark brown eyes, short asymmetrical black bob haircut, faint scar on left eyebrow, oversized charcoal hoodie with neon blue lining, black cargo pants, silver chain necklace, standing on a rain-soaked rooftop at night, neon city skyline in background, teal and magenta color palette, cinematic lighting, medium shot.”
Panel 2 – Escalation
“Lena Park wearing the same oversized charcoal hoodie with neon blue lining and black cargo pants, inside an abandoned subway station with cracked concrete pillars and flickering fluorescent lights, tense expression, holding a holographic data device, teal and magenta color palette, cinematic lighting, medium shot.”
Panel 3 – Confrontation
“Lena Park inside the same abandoned subway station, neon reflections in puddles, determined expression, sparks flying behind her, hoodie slightly torn at the sleeve, teal and magenta color palette, cinematic lighting, medium shot.”
The character remains visually stable while the narrative escalates.
Where Nano Banana 2 Is Especially Strong
1. Sequential Character Consistency
This is its defining advantage. It holds identity markers across prompts better than most models when properly anchored.
2. Wardrobe Memory
If you specify a distinctive jacket or accessory, Nano Banana 2 preserves it across scenes with impressive reliability.
3. Cinematic Lighting Stability
When lighting direction is specified, such as “rim lighting from the left,” it maintains consistency across iterations.
4. Brand Mascot Development
For startups building mascots or AI personalities, this tool reduces redesign time dramatically.
5. Comic Strip Creation
Because of its character retention and emotional control, it excels at multi-panel storytelling.
Common Mistakes to Avoid
One of the biggest errors is assuming the model “remembers” automatically. It does not remember implicitly. It responds to reinforcement.
Another mistake is gradually shortening prompts over time. This causes drift.
Do not evolve from:
Full character blueprint
To:
“Lena looking serious in subway.”
That is a reset.
Professional Workflow Strategy
Advanced creators use this production workflow:
First, generate and approve the master character portrait.
Second, create 3–5 environmental anchor prompts.
Third, define a locked style language.
Fourth, build scenes using consistent blueprint repetition.
Fifth, only introduce controlled evolution.
This mirrors how animation studios manage character sheets.
Example Prompts for Different Use Cases
Mascot Development
“Nova, futuristic AI assistant character, sleek silver humanoid design, glowing cyan eyes, smooth reflective surface, minimalist white and blue bodysuit, friendly confident expression, clean studio background, soft rim lighting, semi-realistic digital illustration.”
Follow-up:
“Nova, same sleek silver humanoid design and glowing cyan eyes, presenting holographic data interface in modern office environment, clean white and blue color palette, soft rim lighting.”
Educational Explainer Series
“Professor Malik, middle-aged data scientist, salt-and-pepper beard, rectangular glasses, navy blazer over black turtleneck, calm and intelligent expression, standing in front of digital whiteboard with AI neural network diagram, studio lighting, medium shot.”
Follow-up:
“Professor Malik wearing the same navy blazer and black turtleneck, pointing at blockchain architecture diagram on digital whiteboard, studio lighting, medium shot.”
Product Storytelling
“Futuristic electric motorcycle, matte black body with neon red accents, angular design, minimal branding, dramatic side lighting, industrial warehouse setting, cinematic style.”
Follow-up:
“The same matte black electric motorcycle with neon red accents, speeding through rain-soaked city street at night, reflections on asphalt, cinematic style.”
How to Evolve a Character Without Breaking Consistency
Nano Banana 2 handles progressive transformation well if changes are incremental and explicit.
Example evolution:
Initial:
“Clean charcoal hoodie.”
Later:
“Hoodie slightly torn at the sleeve.”
Later:
“Hoodie visibly damaged, burn marks on shoulder.”
This controlled degradation preserves identity.
The Strategic Advantage for Creators
For creators building serialized content, Nano Banana 2 eliminates one of the largest inefficiencies in AI image generation: unpredictability.
It allows:
- Visual continuity in newsletters
- Consistent branding for social media
- Multi-episode comic creation
- Cohesive pitch decks
- Visual storytelling for Web3 and AI products
It transforms AI art from experimental output into production asset.
Final Thoughts: Think Like a Showrunner
Nano Banana 2 rewards discipline.
If you treat each prompt as an isolated event, you will get isolated results. If you treat prompts as connected scenes with reinforced identity markers, you unlock its true strength.
The most successful users do not rely on creativity alone. They rely on structure.
Define the character.
Repeat the anchors.
Control the environment.
Lock the camera language.
Evolve deliberately.
When used strategically, Nano Banana 2 becomes less of a generator and more of a visual storytelling engine.
And in a digital landscape dominated by disposable imagery, consistency is power.
-
 AI Model9 months ago
Tutorial: How to Enable and Use ChatGPT’s New Agent Functionality and Create Reusable Prompts
-
 AI Model9 months ago
Tutorial: Mastering Painting Images with Grok Imagine
-

 AI Model7 months ago
How to Use Sora 2: The Complete Guide to Text‑to‑Video Magic
-
 Tutorial7 months ago
From Assistant to Agent: How to Use ChatGPT Agent Mode, Step by Step
-
 AI Model10 months ago
Complete Guide to AI Image Generation Using DALL·E 3
-
 AI Model10 months ago
Mastering Visual Storytelling with DALL·E 3: A Professional Guide to Advanced Image Generation
-
 AI Model12 months ago
Crafting Effective Prompts: Unlocking Grok’s Full Potential
-

 News10 months ago
Anthropic Tightens Claude Code Usage Limits Without Warning